
The Motion of Previsualization: Translating Static Storyboards into Cinematic AI Animatics
Discover how to bridge the gap between static sketches and dynamic cinematic blueprints. This guide details how to leverage image-to-video AI to build high-fidelity previsualization animatics.
Traditional previsualization has long been the unsung backbone of cinematic storytelling. From simple thumbnail sketches to flat, keyframe-to-keyframe animatics with rudimentary digital pans and zooms, directors have relied on these visual blueprints to map out complex sequences before committing expensive crew and camera packages to the set. Yet, these traditional methods often fail to communicate the true spatial depth, lighting dynamics, and emotional weight of a scene, leaving too much to guesswork during principal photography.
The emergence of generative image-to-video AI has fundamentally changed this landscape, transforming static boards into high-fidelity previsualization engines. At Montagea, we view the AI animatic not as a shortcut to bypass the creative process, but as an expansive canvas for directors to iterate on shot design, camera movement, and visual pacing in real time. By translating static boards into dynamic, moving blueprints, creative teams can stress-test their cinematic intent long before the cameras roll.
Beyond the Static Board: The Evolution of the Animatic in AI Filmmaking
Traditional animatics rely heavily on "2.5D" manipulation—taking flat 2D artwork and applying basic digital pans, tilts, or scale adjustments. While functional for timing, this approach fails to communicate complex 3D spatial relationships, changing lighting angles, and organic character blocking. A director cannot easily evaluate how a lens change from a 35mm to an 85mm will compress the background, or how volumetric light will shift as a character crosses a dark corridor.
AI animatics bridge this critical gap. By feeding static storyboard panels into sophisticated image-to-video models, filmmakers can generate short, photoreal or highly stylized motion clips that simulate real-world physical dynamics. This allows for rapid prototyping of visual pacing, lens choices, and environmental atmosphere. Instead of waiting for post-production to see how a sequence flows, directors and cinematographers can evaluate a high-fidelity version of their film during the earliest stages of pre-production.
Preparing Your Storyboard Assets for Image-to-Video Synthesis
To achieve predictable results from an image-to-video AI model, you cannot simply upload any loose sketch and hope for the best. The AI requires clear structural cues to understand depth, perspective, and boundaries.
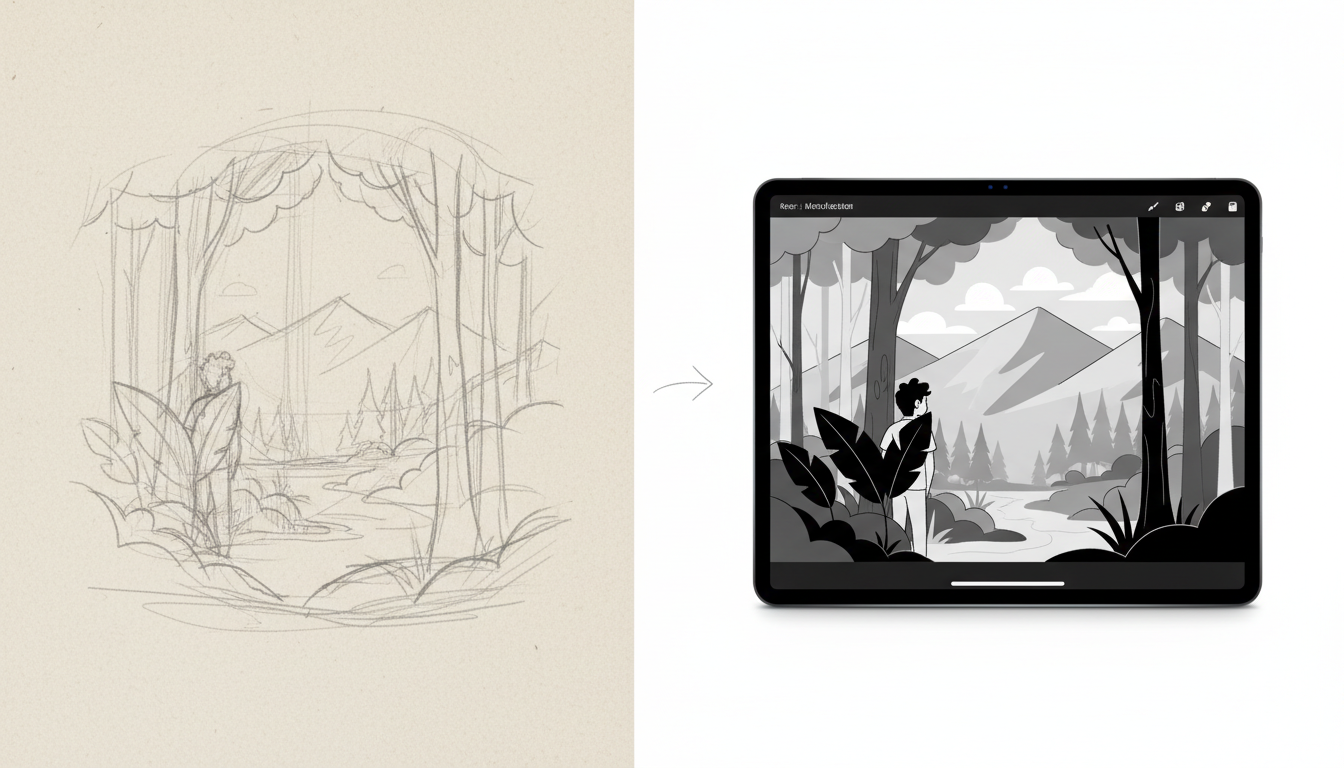
First, consider contrast and line weight. Loose, sketchy pencil drawings with overlapping, messy lines often confuse AI depth estimators, leading to erratic warping or unintended background elements. Clean, high-contrast digital sketches with defined edges yield far more predictable depth maps. Additionally, establishing consistent aspect ratios (such as 2.39:1 or 16:9) and clear framing boundaries is essential to prevent the AI from generating unwanted cropped areas or letterboxing artifacts inside the video frame.
The Three-Value Tone Pass Workflow
One of the most effective ways to prepare your storyboard panels is to apply a basic three-value tone pass (lights, midtones, and darks) to your drawings. This simple shading step dramatically improves the AI's understanding of lighting direction and spatial volume. By defining a clear key light source, a midtone fill, and deep shadow areas, you give the model a mathematical blueprint of the scene's geometry. When the AI generates motion, it will naturally calculate how light wraps around a moving character or how shadows cast across the environment, maintaining the cinematic mood you intended.
Line Art vs. High-Fidelity Boards: Tailoring Your Prompts
The way you prompt an image-to-video model depends heavily on the style of your input storyboard. Rough line art requires a completely different prompting strategy than a fully rendered, painted color panel.
When working with line art, your primary goal is to preserve the hand-drawn aesthetic while introducing subtle parallax or environmental motion. Use style-preservation tags such as "hand-drawn pencil sketch, storyboard art style, graphic novel ink, monochrome, clean lines." Focus your prompt on the surrounding environment rather than complex character movements—for instance, prompt for "subtle wind blowing through the grass, dust motes drifting in the background, slow camera push-in." This keeps the character's facial features and anatomy stable while bringing the frame to life.
Conversely, high-fidelity, painted, or color-rendered boards allow you to leverage existing lighting, textures, and depth cues to generate photorealistic or highly stylized cinematic motion. Here, you can prompt for realistic camera physics, material interactions, and environmental effects. A prompt like "cinematic 35mm film, volumetric fog, realistic skin textures, soft key lighting, anamorphic lens flare" encourages the AI to treat your high-fidelity board as a real physical space, translating painted highlights into dynamic, shifting light reflections as the camera moves.
Controlling the Camera: Translating Storyboard Arrows into Motion Prompts
In traditional storyboarding, directors use a standardized visual shorthand—such as bold arrows indicating camera tracks, zooms, tilts, and pans. Translating these two-dimensional symbols into three-dimensional AI camera movements requires a structured approach.
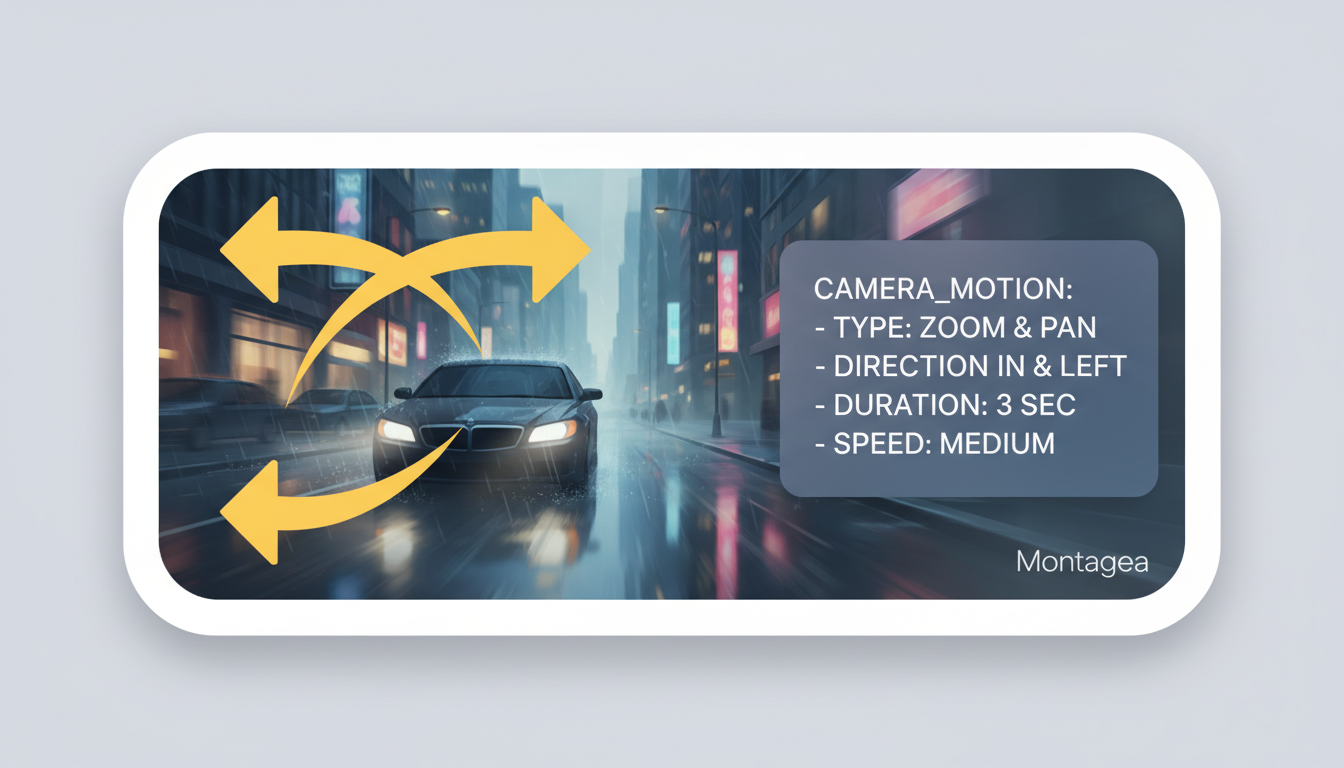
To achieve this, filmmakers can use a translation matrix that maps physical camera moves directly to AI motion parameters and camera control values. Instead of using generic terms like "move closer," use precise cinematography terminology. Using camera-specific phrasing in your text prompts overrides default AI behaviors and prevents the model from introducing erratic, unwanted character movements.
| Storyboard Arrow / Command | AI Text Prompt Equivalent | Recommended Motion Strength |
|---|---|---|
| Push-In / Zoom Arrow | "Slow camera dolly-in, cinematic push-in, 50mm lens perspective" | Low to Medium (0.3 - 0.5) to maintain focus |
| Tracking / Pan Arrow | "Horizontal camera pan left, tracking shot following the subject" | Medium (0.5 - 0.7) for smooth lateral movement |
| Tilt / Crane Arrow | "Low-angle crane shot, vertical camera tilt up, revealing the skyline" | Medium (0.4 - 0.6) to avoid perspective distortion |
| Dynamic Push & Pan | "Dolly-zoom, camera trucks right while panning left, parallax effect" | High (0.7 - 0.8) with strict seed control |
To prevent your animatic frames from locking up, you need to understand how to fix frozen and stagnant motion in image-to-video workflows. Balancing your motion strength parameters is key: too high, and the visual field collapses into chaotic morphing; too low, and the frame remains an unmoving, static image.
The Continuity Challenge: Maintaining Character and Prop Integrity Across Shots
The single greatest obstacle in AI filmmaking is maintaining visual consistency across multiple generated clips. When cutting from a wide shot to a close-up, characters and props must remain recognizable and structurally logical.
For characters, preventing facial distortion is paramount, which requires a deep dive into the anatomy of facial stability in AI generation. To anchor the visual identity of your actors across different storyboard panels, utilize seed locking and consistent character reference sheets (IP-Adapter inputs) in your generation pipeline. By feeding the exact same character reference image alongside each storyboard frame, the AI can map consistent facial features, hairstyles, and clothing onto the newly generated motion clips.
Maintaining the visual logic of key objects is critical; learn more about managing the physics of prop continuity in AI video production. If a character is holding a specific weapon or tool, that object must not morph into a different shape when the camera angles change. To prevent this, include highly descriptive prop tags in every prompt and keep the motion strength conservative around the character's hands.
Before rendering any sequence, run your assets through this Pre-Visualization Continuity Checklist:
- Lighting Direction: Is the key light consistently coming from the same screen-direction across sequential shots?
- Wardrobe and Features: Are the character's clothing colors, hair length, and distinct facial marks identical to the reference sheet?
- Spatial Geometry: Does the layout of the room or environment match the master shot's established geography?
- Prop Scale: Do key props maintain a logical scale relative to the characters holding them?
Assembly and Pacing: Stitching the AI Animatic in Post-Production
Once you have generated your individual AI motion clips, the final step is to assemble them into a cohesive, timed sequence within your non-linear editor (NLE) of choice.
Begin by exporting your AI-generated clips using a structured naming convention based on scene and shot numbers (e.g., SC01_S01_DollyIn_v01.mp4). This simple organizational habit prevents confusion when managing dozens of micro-generations. Import these clips into your timeline and begin trimming them to match the desired rhythm of the scene.
Do not underestimate the role of temp music, sound effects, and scratch dialogue during this phase. Adding a simple drone track, footsteps, or roughly recorded voiceover lines validates the pacing of your AI animatic, instantly revealing whether a shot needs to be longer or if a camera movement is too fast.
Because AI generation is rapid, you can treat this as an iterative editing process. If a transition feels jarring or a pacing bottleneck is identified, you do not have to live with it. Simply adjust the prompt or the camera motion parameters, re-generate that specific shot, and drop the new iteration directly back into your timeline. This fluid loop of generation and assembly is what makes the AI animatic an indispensable tool for the modern, agile director.
Can I use rough, hand-drawn pencil sketches to generate a high-quality AI animatic?
Yes, but it requires specific handling. Rough, low-contrast pencil sketches can confuse AI depth estimators, leading to warping. To make them work, use a strong style-preservation prompt (e.g., "pencil sketch style, clean line art") and keep the motion parameters subtle. For the best results, ink over your rough sketches digitally or apply a three-value tone pass to establish clear depth layers before generation.
How do I prevent the AI from completely changing my characters' outfits between storyboard panels?
To maintain wardrobe consistency, use a dedicated Character Reference (CRef) or IP-Adapter image of your character in the correct outfit alongside your storyboard input. Additionally, write highly specific descriptions of the clothing in your text prompts for every shot, and keep the motion strength moderate to prevent the AI from re-interpreting the fabric details.
What are the best image-to-video AI tools currently used by professional previsualization artists?
Professional previsualization workflows commonly leverage state-of-the-art tools like Runway Gen-3 Alpha, Luma Dream Machine, and Kling AI. These platforms offer robust camera control parameters and high-fidelity image-to-video capabilities, making them ideal for translating static panels into smooth, cinematic motion.
How do I translate complex camera movements like a rack focus or a dramatic crane shot into AI prompts?
Complex moves require precise cinematography terminology. For a rack focus, prompt: "Shallow depth of field, focus pulls from the foreground object to the background character, cinematic lens." For a crane shot, prompt: "Vertical crane shot rising up, slow camera tilt down, high-angle master shot." Keep motion strength at a medium level (0.4 - 0.6) to ensure the camera path remains smooth and continuous.



