
The Physics of Continuity: How to Maintain Prop Consistency in AI Video Production
While character consistency dominates the AI filmmaking conversation, prop consistency remains the silent killer of narrative continuity. Discover how to treat generative AI as an intelligent texturing engine built on top of structured geometric bases to lock down physical objects across every cut.
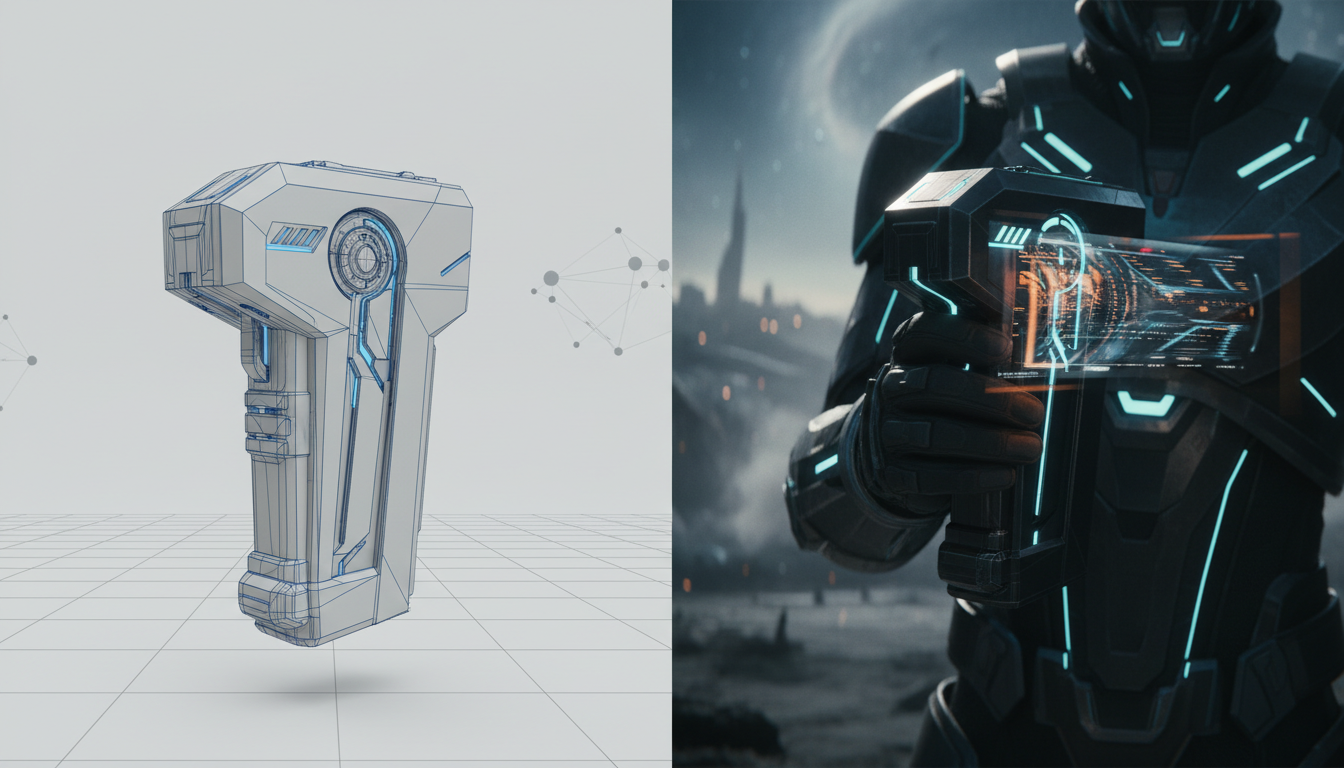
Independent filmmakers and studio professionals adopting AI-powered workflows often focus their energy on maintaining character consistency. We spend hours refining facial seeds, prompting specific wardrobe items, and trying to keep the protagonist looking identical from shot to shot. Yet, the moment that character picks up a vintage key, a sci-fi blaster, or a simple coffee mug, the illusion of reality frequently shatters. The key's teeth shift shape, the blaster's metallic texture turns to plastic, and the coffee mug grows an extra handle mid-scene.
This is the silent killer of narrative continuity: the lack of object permanence in generative models. At Montagea, our approach to AI filmmaking is grounded in treating neural networks not as magical, random image generators, but as intelligent texturing and rendering engines built on top of structured visual foundations. By shifting your workflow from raw text-to-video luck to a methodical, multi-pass pipeline, you can lock down prop geometry, material weight, and scale across an entire sequence.
The Prop Morphing Problem: Why AI Video Lacks Object Permanence
To solve prop inconsistency, we must first understand why it happens. Traditional film production relies on physical props that occupy three-dimensional space, obey the laws of physics, and reflect light based on tangible material properties. AI video generators, however, do not possess a native 3D understanding of the world. They operate in a mathematical latent space, generating frames sequentially by predicting the most statistically probable next set of pixels based on training data.
This lack of spatial awareness results in the "liquid prop" phenomenon. When a camera pans around an AI-generated object, the model struggles to calculate how that object's hidden sides should look. Instead of rotating a rigid structure, the model morphs the object's geometry on the fly. A vintage brass compass might look perfect in a wide shot, but during a camera push-in, its glass face might warp, or its markings might slide across the dial. Because the model is guessing the geometry frame-by-frame, any complex shape with fine details is highly susceptible to visual drift.
To overcome this, professional creators must stop relying on pure text-to-video prompts to build props. We must treat generative AI as a neural rendering layer over structured visual guides. By providing the AI with a rigid geometric anchor, we force the diffusion process to respect boundaries, scale, and perspective, eliminating the fluid, unstable transformations that ruin cinematic immersion.
The Multi-Pass Asset Workflow: From Master Reference to Motion
The most reliable way to maintain prop consistency is to separate asset design from scene generation. Instead of prompting the prop and the actor simultaneously, you should create a single, definitive "hero" reference sheet for the object first, and then use image-to-video (I2V) tools to drive the action.
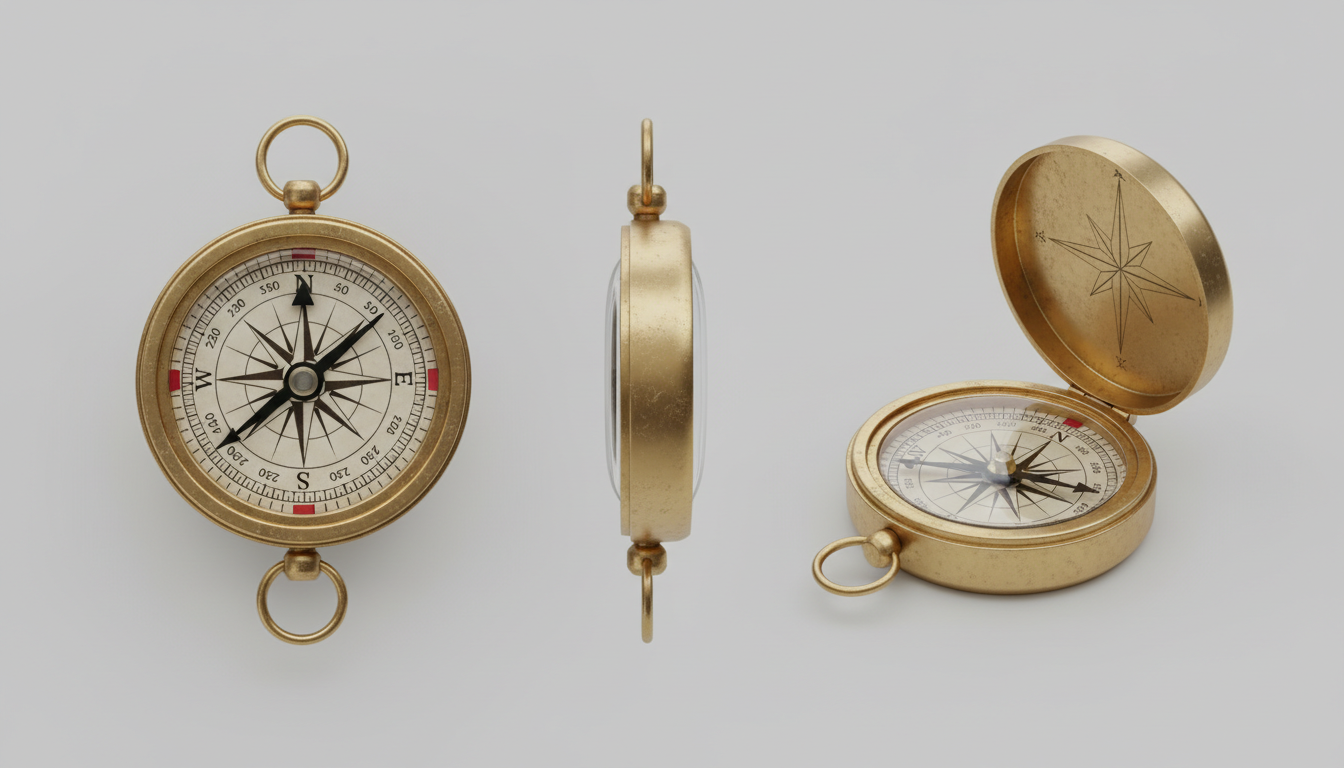
Step 1: Generating the Master Prop Sheet
Begin by generating an orthographic reference sheet of your prop in an image generator like Midjourney or Stable Diffusion. Use terms like "concept art sheet, multiple angles, front view, side view, isometric view, clean studio white background". This forces the model to generate the exact same object from different perspectives on a single canvas. Once you have a sheet that captures the perfect design, crop the specific angle you need for your starting frame.
Step 2: Driving Motion with Image-to-Video Pipelines
With your static master asset selected, feed it into your image-to-video generator. Rather than letting the AI invent the prop's details, you are now asking it to animate a pre-existing, highly detailed asset. To prevent the prop from distorting when the actor holds it, creators must master the physics of subtle, cinematic motion in image-to-video workflows. By keeping camera moves deliberate and character gestures controlled, the AI has a much easier time keeping the object's structural integrity intact.
When writing the prompt to accompany your image input, anchor the AI by referencing the specific, unique design markers of the master prop. Do not just prompt "a man holding a device." Instead, describe the device using the exact visual language of your master sheet: "A man's hand holding the weathered brass compass, featuring a cracked glass face and a tarnished copper needle, cinematic lighting, slow subtle breathing movement." Specifying unique scratches, material finishes, and color coordinates keeps the neural network focused on reproducing those exact pixels rather than generating a generic replacement.
Prompting for Material and Weight Stability
When characters interact with props, AI models frequently struggle to understand where the human hand ends and the object begins. This often results in the prop melting into the character's fingers or bending like rubber. To combat this, your prompts must explicitly define the physical properties and material rigidity of the object.
Just as keeping a character's features locked requires a deep understanding of facial geometry, stopping physical objects from warping demands a strict approach to material prompting, a concept we explore deeply in our guide on the anatomy of facial stability in AI video production. For props, this means using heavy, uncompromising material descriptors that discourage the model from introducing organic warping.
The Prop-First Prompting Formula
To ensure the AI respects the physical weight and rigidity of your object, structure your prompts using this three-part formula:
[Rigid Material Anchor] + [Interaction Constraint] + [Environmental Context]
- Rigid Material Anchor: Use uncompromising terms like "solid die-cast iron," "brushed industrial steel," "unyielding solid oak," or "tempered heavy glass." Avoid vague terms like "metal" or "wood," which the AI can easily interpret as flexible or plastic.
- Interaction Constraint: Define how the hand meets the object to prevent clipping. Use phrases like "fingers firmly wrapped around the solid handle, no clipping, fingers do not merge with the metal."
- Environmental Context: Keep the lighting and background consistent to anchor the object's surface reflections. Use terms like "soft studio key light reflecting off the matte steel surface."
For example, if you are prompting a character holding a sci-fi container, your prompt should read: "A close-up of a soldier's gloved hand gripping a solid anodized titanium canister. The canister is heavy and unyielding, with brushed metal textures that reflect the red warning lights of the spaceship corridor. The fingers remain wrapped tightly around the rigid cylindrical handle, showing realistic physical weight and no warping."
Hybrid Pipelines: Anchoring AI with 3D Greyboxes and Real-World Stand-ins
For complex action sequences or shots with dramatic camera movement, prompting alone will not suffice. To achieve absolute continuity, professional pipelines combine generative AI with traditional 3D modeling or physical production stand-ins.
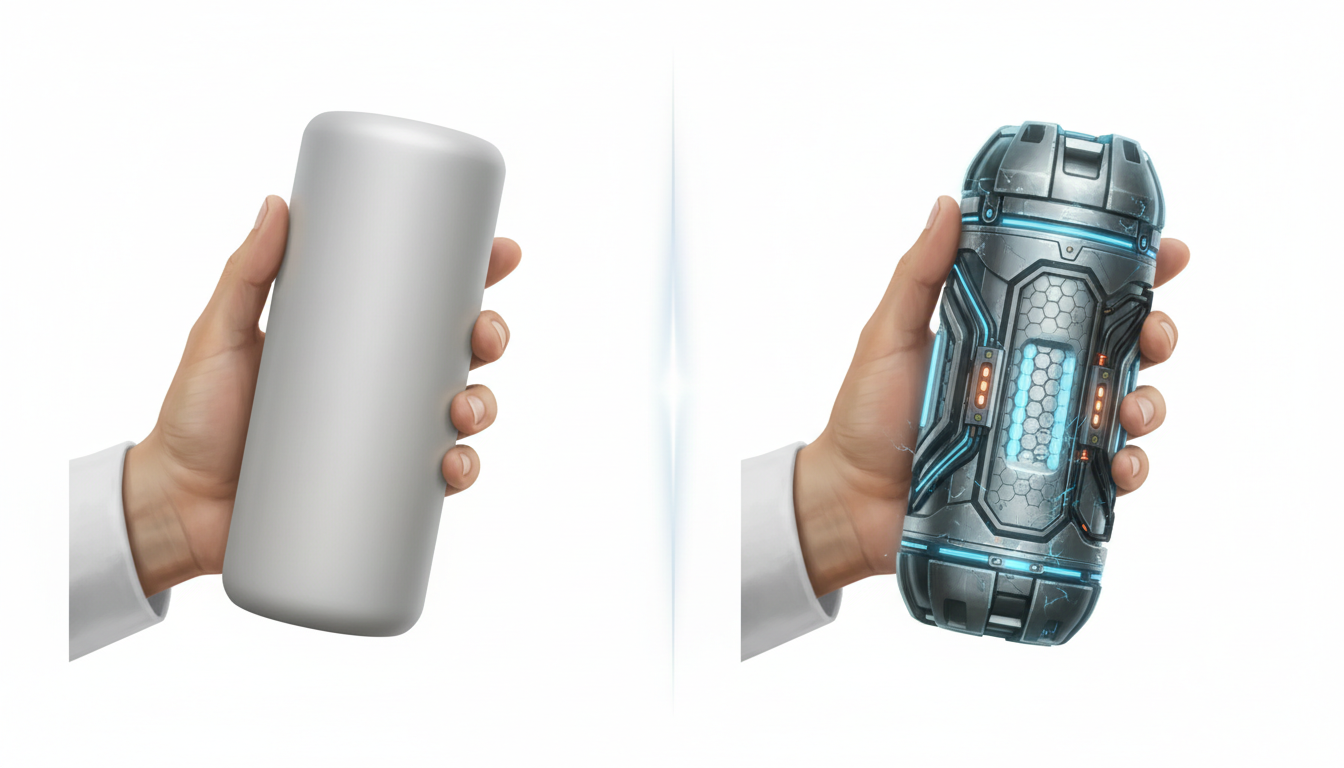
This hybrid approach uses a basic 3D model—often called a "greybox"—rendered in software like Blender. You do not need to spend hours texturing or detailing this model. Its only job is to provide perfect perspective, scale, and lighting direction. You render a simple animation of this greybox rotating or moving through space, and then use it as an image-to-video or ControlNet input. The AI acts as an intelligent texturing engine, skinning the highly detailed, photorealistic surface of your prop directly over the mathematically perfect 3D geometry.
Similarly, you can use real-world physical stand-ins on set. If your character needs to hold a complex sci-fi datapad, have them hold a painted cardboard box cut to the exact dimensions. The physical weight ensures the actor's muscles react naturally, and the solid green or blue surface of the cardboard provides a perfect tracking anchor. In post-production, you can feed this footage into your AI pipeline, allowing the model to replace the colored cardboard with a beautifully rendered, consistent digital prop.
| Workflow Method | Pros | Cons | Best Used For |
|---|---|---|---|
| Pure Text Prompting | Fastest setup; requires no external software or assets. | High rate of morphing; poor continuity across multiple angles. | Simple, static wide shots where the prop is not a focal point. |
| I2V with Static Master Assets | Excellent visual detail; maintains design style across shots. | Struggles with extreme camera rotations or complex handling. | Medium shots, close-ups with subtle character interaction. |
| Hybrid 3D-to-AI Pipelines | Flawless geometry; perfect scale and perspective; zero morphing. | Requires basic 3D modeling and rendering skills. | Action scenes, complex camera movements, and hero prop close-ups. |
Post-Production Continuity: Masking and Tracking Fixes
Even with a rigorous pre-production and prompting workflow, AI-generated video can still exhibit minor visual drifts. A button might slide a fraction of an inch to the left, or a metallic texture might flicker. Rather than wasting hours re-rendering the entire shot, professional editors fix these minor errors in post-production.
Using industry-standard compositing tools like Adobe After Effects, DaVinci Resolve, or Nuke, you can isolate the prop using planar tracking (such as Mocha) and rotoscoping. If you have one perfect frame where the prop looks exactly as it should, you can freeze-frame that specific area, track it onto the moving prop in the rest of the shot, and blend the edges with a soft mask. This locks the texture and geometry in place while preserving the natural lighting and movement of the surrounding scene.
For more severe morphing errors, localized AI-assisted inpainting can rescue the shot. Instead of running the entire frame through an image-to-video generator, you mask out only the malfunctioning prop and run a targeted inpaint pass. This allows you to regenerate the object while keeping the actor's face, hands, and background completely untouched.
Finally, smart editing choices can mask minor design shifts. When cutting from a medium shot of a character holding a prop to a close-up, planning seamless match cut transitions is vital to mask any minor design shifts, a technique we cover in detail in our guide on the geometry of the cut and AI match transitions. By cutting on action—such as the moment the prop impacts a surface or is lifted quickly—the viewer's eye is drawn to the motion rather than any subtle changes in the object's texture or geometry.
Why does my AI-generated prop change shape when the camera moves?
AI video generators do not have a native, three-dimensional understanding of physical objects. When the camera moves, the model generates the new angles frame-by-frame based on statistical probability. Because it lacks a rigid geometric blueprint, it often guesses incorrectly, resulting in morphing, warping, or "liquid" geometry.
How do I keep a weapon or tool looking exactly the same across different AI video scenes?
To maintain consistency, use a multi-pass asset workflow. First, generate a single "master prop sheet" showing the weapon or tool from multiple angles. Crop the angle you need and use it as an image-to-video (I2V) input rather than prompting from scratch. Additionally, use highly specific material prompts (e.g., "solid brushed titanium") to enforce structural rigidity.
Can I use 3D models to guide AI video generators for better prop consistency?
Yes, this is one of the most effective professional workflows. By rendering a simple, untextured 3D model (a greybox) in software like Blender and using it as a visual guide or ControlNet input, you provide the AI with perfect mathematical geometry. The AI then acts as a neural texturing engine, skinning realistic details over a stable 3D shape.
What are the best image-to-video settings to prevent object morphing?
To minimize morphing, keep your motion strength settings low to moderate (typically between 3 and 5 in most generators). High motion settings force the model to invent too many new pixels, leading to structural collapse. Additionally, pair your image input with a highly descriptive text prompt that emphasizes rigid, heavy materials and physical weight.



