
How to Use Masked Image Editing for Typographic Assets
Learn how to execute localized edits and typographic corrections using masked image editing. This guide covers general asset preparation, mask configuration, and prompt structuring.
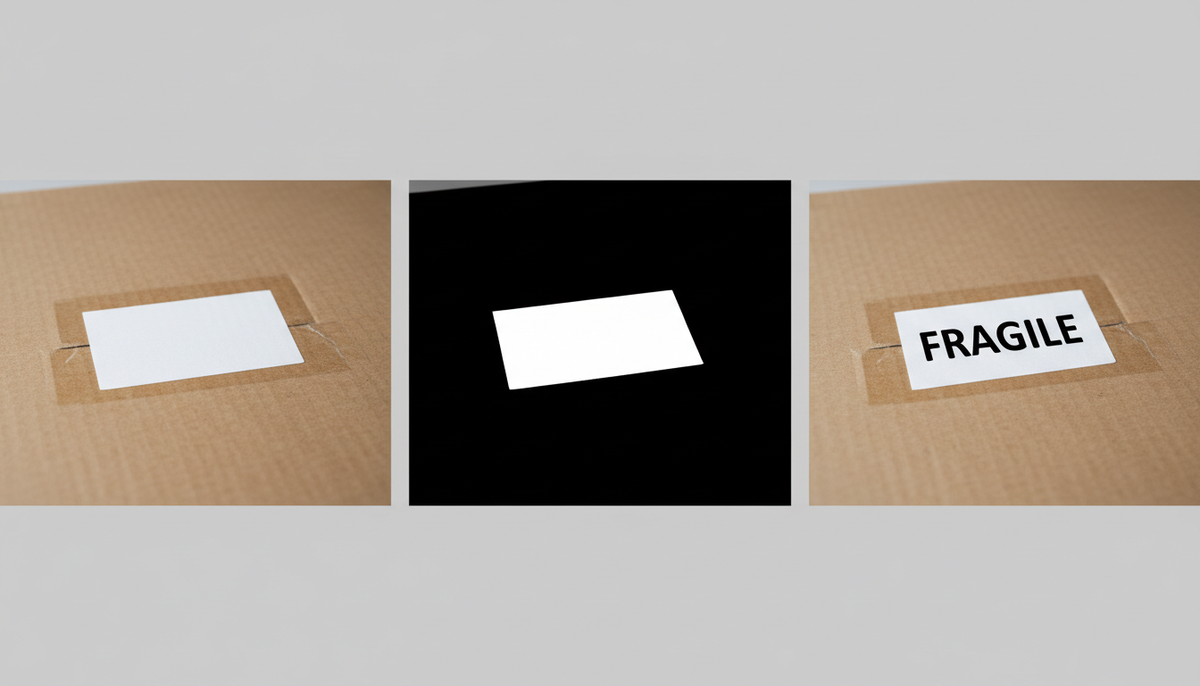
Masked image editing is designed to allow creators to modify precise regions of an image while leaving the surrounding pixels untouched. This technique is often used for localized typography adjustments, such as updating labels, correcting text errors, or modifying packaging branding. In many workflows, using a binary mask that aligns with the source image's dimensions and writing an edit prompt focused on the changes inside the masked zone can help achieve clean, undistorted results.
The Core Mechanics of Masked Editing
Masked editing, commonly referred to as inpainting, isolates a specific region of an asset for regeneration while locking the rest of the canvas. In professional creative pipelines, this prevents the common frustration of losing a perfect composition or character likeness just because a single detail or word needs correction.
A key advantage of typographic image models is their ability to render text. When you isolate a portion of an image—such as a storefront sign, a product label, or a book cover—the model can render crisp, highly accurate text that blends into the existing environment. To achieve this, inpainting workflows typically utilize a binary mask: a black-and-white image where white represents the target area to be modified (the active workspace) and black represents the area to be preserved (the locked pixels).
Step-by-Step Asset Preparation and Mask Configuration
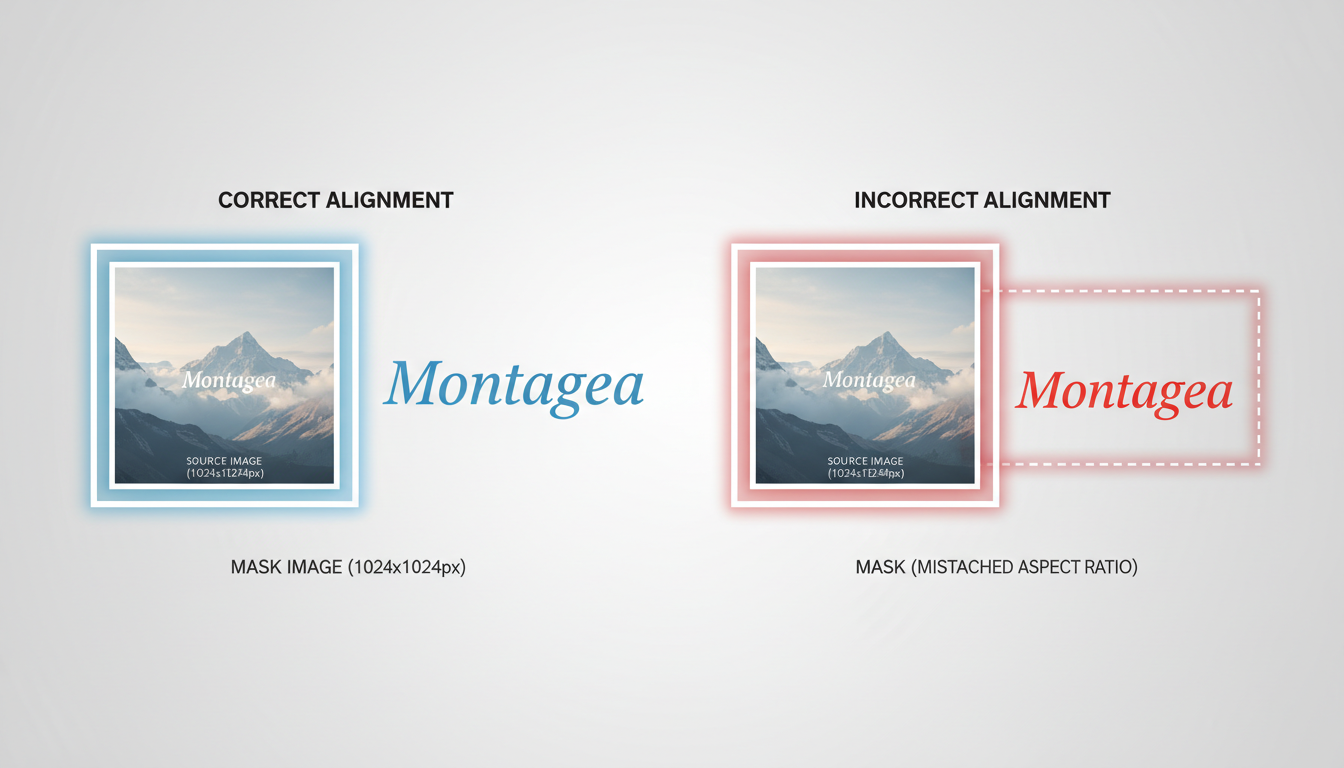
To avoid alignment shifts, pixelation, or stretched text, it is helpful to prepare your source assets carefully. Mismatched aspect ratios or resolutions between your source image and your mask can often lead to failed generations.
The Mask Preparation Checklist
- Verify Dimensions: Check your generator's requirements to see if the source image and the mask should share identical pixel dimensions and aspect ratios to prevent alignment shifts.
- Apply an Edge Feather: Depending on the tool, applying a subtle soft feather on the mask boundaries in your image editor can help prevent harsh, noticeable seams between the newly generated pixels and the original background.
- Export Correctly: Export your mask in a format compatible with your chosen generator, such as a high-contrast grayscale image, to help avoid color space mismatches during the upload process.
| Parameter | Correct Configuration | Incorrect Configuration (Avoid) |
|---|---|---|
| Dimension Match | Matching dimensions (as recommended by your generator) | Mismatched sizes or aspect ratios |
| Mask Colors | High-contrast white and black | Low-contrast grays or colored masks |
| Boundary Edge | Subtle feathering for seamless blending | Hard, aliased, pixelated edges |
Writing Effective Edit Prompts for Localized Changes
A common mistake in masked editing is rewriting the prompt for the entire image. This confuses the model, causing it to attempt to pack global context into a tiny, isolated masked area. Instead, write a prompt that describes only what should appear inside the white boundaries of your mask.
To leverage the model's text-rendering engine, use explicit typographic instructions and place your desired text inside quotation marks. Additionally, specify the style, material, and lighting to match the surrounding image.
The following prompt is an illustrative template designed to guide your setup:
"A clean white label with the word 'FRAGILE' printed in bold, red, sans-serif typography, matching the soft overhead studio lighting and cast shadows of the surrounding scene."
By keeping the prompt focused on the label itself, the generation engine can focus on rendering the letters cleanly, matching the texture of the paper and the angle of the light.
Downstream Workflows: From Static Edits to Motion and 3D
At Montagea, we design workflows that treat static image generation not as an isolated step, but as the foundation for multi-modal production. Whether you are using our creative agent, Gigi, to orchestrate the entire process or manually configuring individual models, mastering localized editing ensures your pipeline remains efficient and predictable. Perfecting text and local details on a static image is a crucial first step before sending the asset to motion generation tools. In professional workflows, static assets with flawed typography or distorted details will inevitably fail when processed by video generators, as the motion models will amplify those static errors into distracting visual artifacts.
If you are working with custom styles or characters, you can first train a specialized model using our guide on how to train a Z-Image LoRA, then use masked editing to refine the text elements on the generated outputs. Once your static asset is polished and the typography is flawless, you can transition it into dynamic video pipelines. For instance, learn how to animate your refined images by following our guide on WAN image-to-video workflows.
This systematic approach is equally important for character-driven projects. For projects featuring speaking virtual characters, precise mouth and face details are vital. Prepare your characters correctly using our tutorial on preparing assets for AI lip-sync models. If your workflow extends into spatial computing or gaming, you can convert these clean 2D assets into 3D meshes. Read our guide on using image-to-3D models for asset generation to learn how to transition your polished static designs into production-ready 3D elements.
Why is my edited text blurry or misaligned in the final output?
This can occur due to a mismatch in the dimensions or aspect ratio between your source image and your mask. If the mask is stretched or resized during upload, the model may attempt to fit the text into a distorted canvas. Checking that both files align in pixel dimensions and aspect ratio before starting your edit can help resolve this.
Can I use semi-transparent or soft gray masks for partial blending in masked editing?
Generally, standard inpainting workflows perform best with a high-contrast binary mask (solid white and solid black). Semi-transparent or gray areas can cause unpredictable blending artifacts, noise, or flat color patches. For a smooth transition, consider using a solid white mask with a subtle feathered edge at the boundary.



