
How to Train a Z-Image LoRA: Dataset Preparation and Evaluation Workflows
Master the art of training a custom Z-Image LoRA. This step-by-step guide covers dataset curation, precise captioning, trainer configuration, and systematic evaluation workflows.
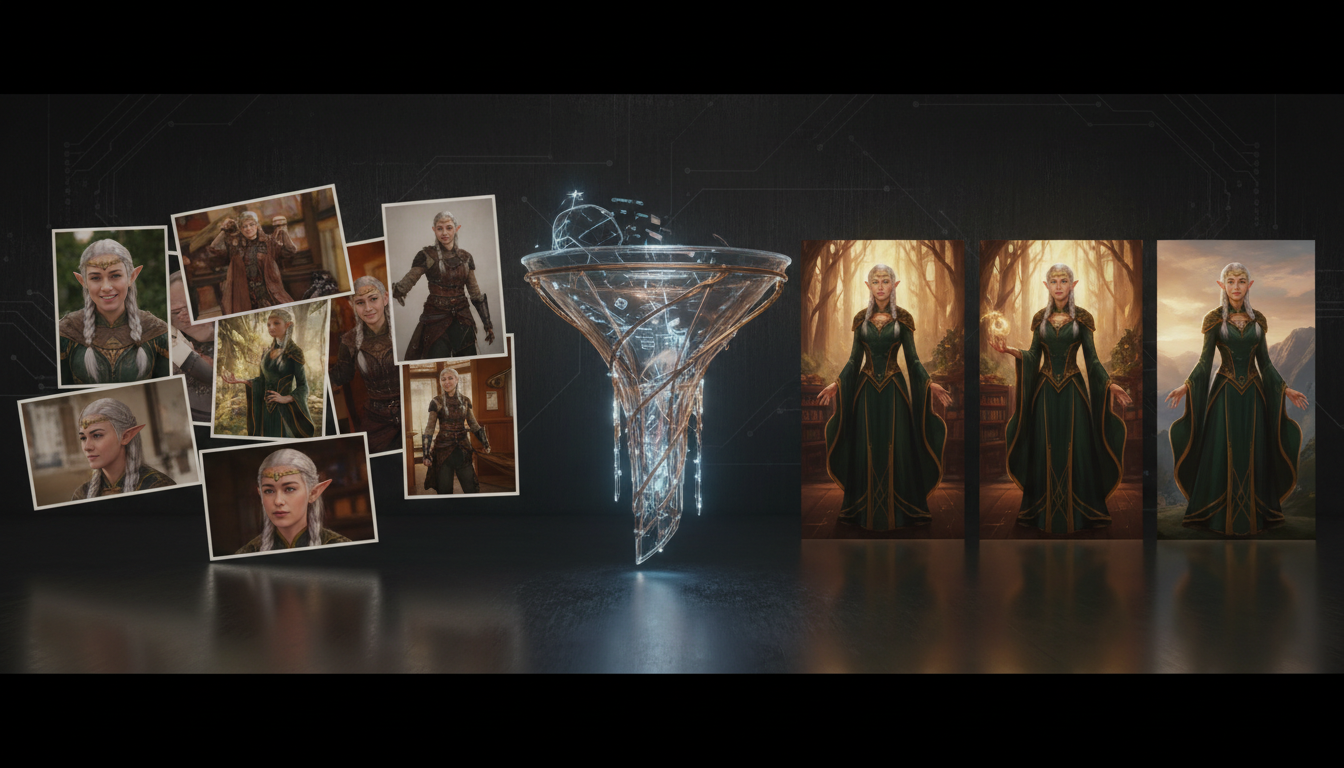
Training a custom Z-Image LoRA involves preparing a consistent training dataset, writing precise captions with a unique trigger word, and configuring trainer parameters. By focusing on dataset hygiene rather than complex hyperparameter tuning, creators can build reliable character or style adapters. Once trained, these LoRAs act as foundational anchors to generate highly consistent assets across multi-frame production pipelines, including advanced image-to-video workflows.
Understanding the Z-Image LoRA Pipeline
In modern AI asset generation, maintaining visual consistency across multiple shots is one of the greatest hurdles. A Z-Image LoRA (Low-Rank Adaptation) solves this by acting as a lightweight adapter trained on top of a base image generation model. Instead of retraining an entire model—which is computationally expensive and slow—the Z-Image trainer fine-tunes a small set of weights. This process allows you to inject a highly specific character, object, or art style into your generations using a designated trigger word.
At Montagea, we look at custom-trained LoRAs as the foundational style anchors for complex multi-asset campaigns. Whether you are using Montagea’s creative agent, Gigi, to orchestrate your production or building assets manually, having a reliable style adapter ensures that your characters and branded environments remain identical from the first storyboard frame to the final video sequence. By mastering the training pipeline, you transition from relying on random prompt variations to commanding predictable, production-grade outputs.
Dataset Preparation: Curating and Cleaning Your Images
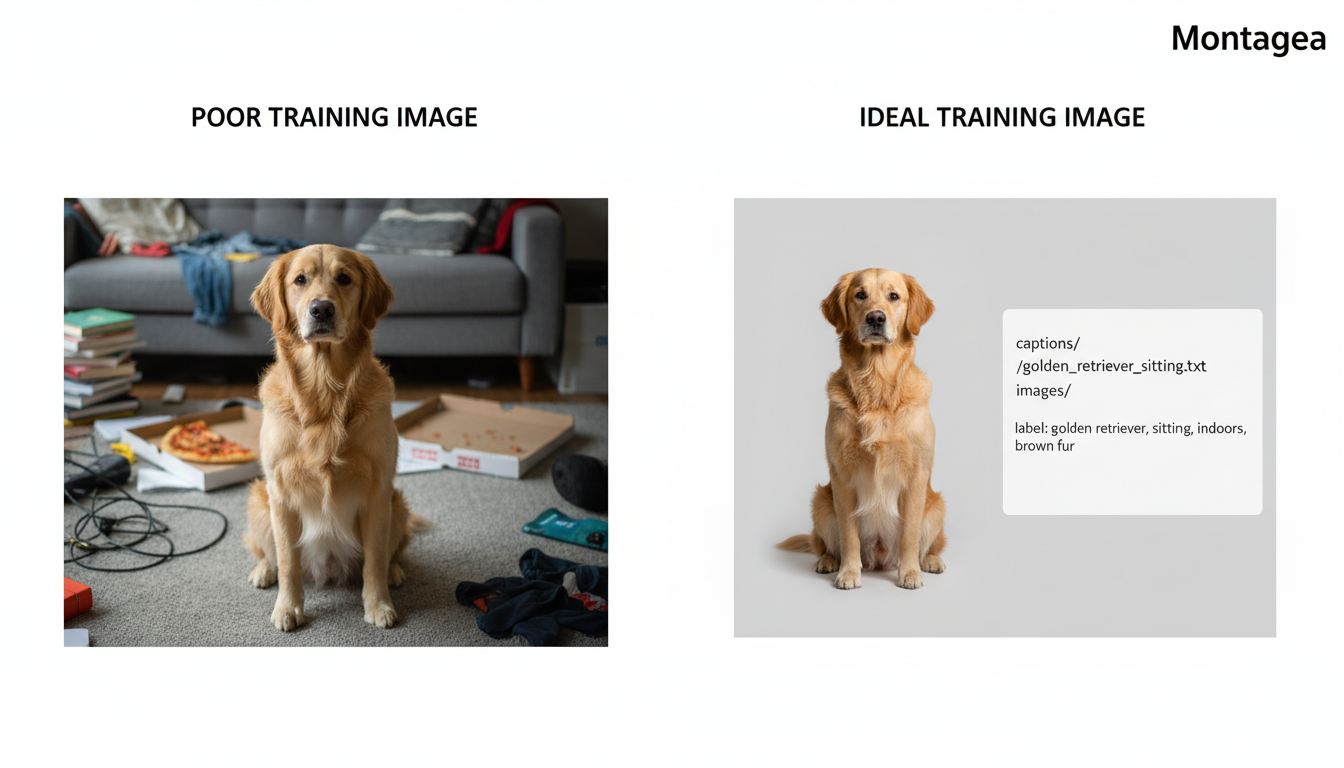
The success of your Z-Image LoRA depends almost entirely on the quality of your training dataset. While it is tempting to throw hundreds of unorganized images at a trainer, a curated set of high-fidelity images yields far better results. The trainer needs to learn the core features of your subject without getting confused by background noise or compression artifacts.
Dataset Hygiene Rules
- Visual Variety: Include different angles, lighting conditions, and expressions. If every training image features your subject facing forward in bright daylight, the model will struggle to generate them in profile or under dramatic night lighting.
- Resolution and Aspect Ratio: Ensure your source images are clear and free of watermarks or blur. Mixed aspect ratios are supported, but keeping them consistent (e.g., 1:1 square or 16:9 widescreen) prevents unexpected cropping or stretching during the training phase.
- Subject Isolation: Background clutter can easily corrupt your training. If you are training a character, the model might accidentally learn that a specific background tree or wall texture is part of the character's design. To prevent this, you should isolate your subject cleanly using advanced background removal techniques before uploading your training folder.
The Captioning and Trigger Word Checklist
Each image in your dataset should be paired with a matching text file (e.g., 01.jpg paired with 01.txt) containing descriptive captions. These captions teach the model which parts of the image belong to your subject and which parts are generic elements. Use this checklist to format your captions:
| Requirement | Best Practice | Example Caption Structure |
|---|---|---|
| Unique Trigger Word | Use a rare, non-dictionary word (like z_chr_alex or mystic_glass_style) so the model doesn't confuse it with existing concepts. | "A photo of z_chr_alex..." |
| Describe the Variable Elements | Explicitly describe clothes, background, and expressions. This tells the model not to bake those temporary elements into the core identity. | "A photo of z_chr_alex wearing a blue jacket, sitting in a coffee shop, smiling." |
| Omit Core Style/Features | Do not describe the features you want the model to associate permanently with the trigger word (e.g., if the character always has green eyes, don't mention green eyes). | Keep the green eyes unmentioned so the trigger word automatically implies them. |
Configuring the Z-Image Trainer
Once your dataset is prepared and zipped, you upload it to the Z-Image trainer. While default settings are often a safe starting point, understanding the core parameters allows you to fine-tune the training run for optimal flexibility.
Key Training Parameters
- Training Steps: The number of steps determines how thoroughly the model learns your dataset. Too few steps can result in an under-trained model that ignores your trigger word, while too many can cause over-fitting. Adjust steps based on your specific dataset size and trainer recommendations.
- Learning Rate: This controls how drastically the model weights are adjusted in each step. Balancing convergence speed with stability is key; consult your specific trainer's documentation for recommended baseline rates.
- Trigger Word Configuration: Ensure the exact trigger word used in your text files is declared in the trainer's configuration. This helps the model associate the custom style or character with the correct token during inference.
To monitor training progress without waiting for the entire run to finish, set up a few evaluation prompts. By structuring production-ready prompts to test your model's limits at intervals, you can watch how the model develops. This allows you to spot issues early and adjust your parameters on subsequent runs.
Evaluating LoRA Outputs and Transitioning to Video
After your training run completes, you must systematically evaluate the resulting LoRA file. Do not rely on a single test generation; instead, run a structured test suite to ensure the adapter is both accurate and flexible.
The Evaluation Matrix
Compare your generated outputs against this diagnostic table to determine if your LoRA requires adjustment:
| Observed Output | Diagnosis | Action Plan |
|---|---|---|
| Subject lacks key features; ignores the trigger word completely. | Under-fitting | Increase the training steps, slightly raise the learning rate, or ensure your trigger word is spelled consistently in all caption files. |
| Images look burnt, highly contrasted, or repeat the exact poses from the training dataset. | Over-fitting | Lower the training steps, reduce the learning rate, or add more visual variety (different backgrounds and poses) to your training dataset. |
| The subject looks perfect, responds to prompt instructions, and changes clothing or background easily. | Optimal Training | Save this LoRA version as your production-ready asset anchor. |
Moving from Static Assets to Motion
Once your LoRA consistently produces high-fidelity static assets, you can seamlessly integrate them into your video production pipeline. Consistent characters are the perfect starting point for generating cinematic sequences. By generating your keyframes using your custom Z-Image LoRA, you ensure that the character's facial structure, clothing, and style remain identical across different scenes.
From there, you can transition to motion by animating your consistent character assets using image-to-video workflows. This allows you to maintain absolute narrative continuity, moving your custom-trained characters naturally through dynamic environments without losing their identity from frame to frame.
What is the typical training time for a Z-Image Turbo LoRA?
Training time depends on the platform, hardware, and dataset size. Cloud-based training runs typically complete relatively quickly, but you should refer to your specific provider's performance metrics and queue times for accurate estimates.
Can I combine a Z-Image LoRA with other style adapters during inference?
Yes. You can combine a character-focused Z-Image LoRA with another style-focused LoRA during inference by adjusting their respective weights (e.g., setting the character LoRA weight to 0.8 and the style LoRA weight to 0.4) to achieve both character and stylistic consistency simultaneously.
How do I update an existing LoRA if I want to add more training images later?
You cannot directly append new images to an existing compiled LoRA file. To update your model, you must add the new, cleaned images to your training folder, update the corresponding text captions, and initiate a fresh training run using the expanded dataset.



