
Beyond the Default Drone: Prompting Weight, Atmosphere, and Scale in AI Establishing Shots
Stop settling for floaty, weightless drone shots in your AI films. Discover how to prompt realistic camera physics, atmospheric occlusion, and structural scale to ground your cinematic worlds.
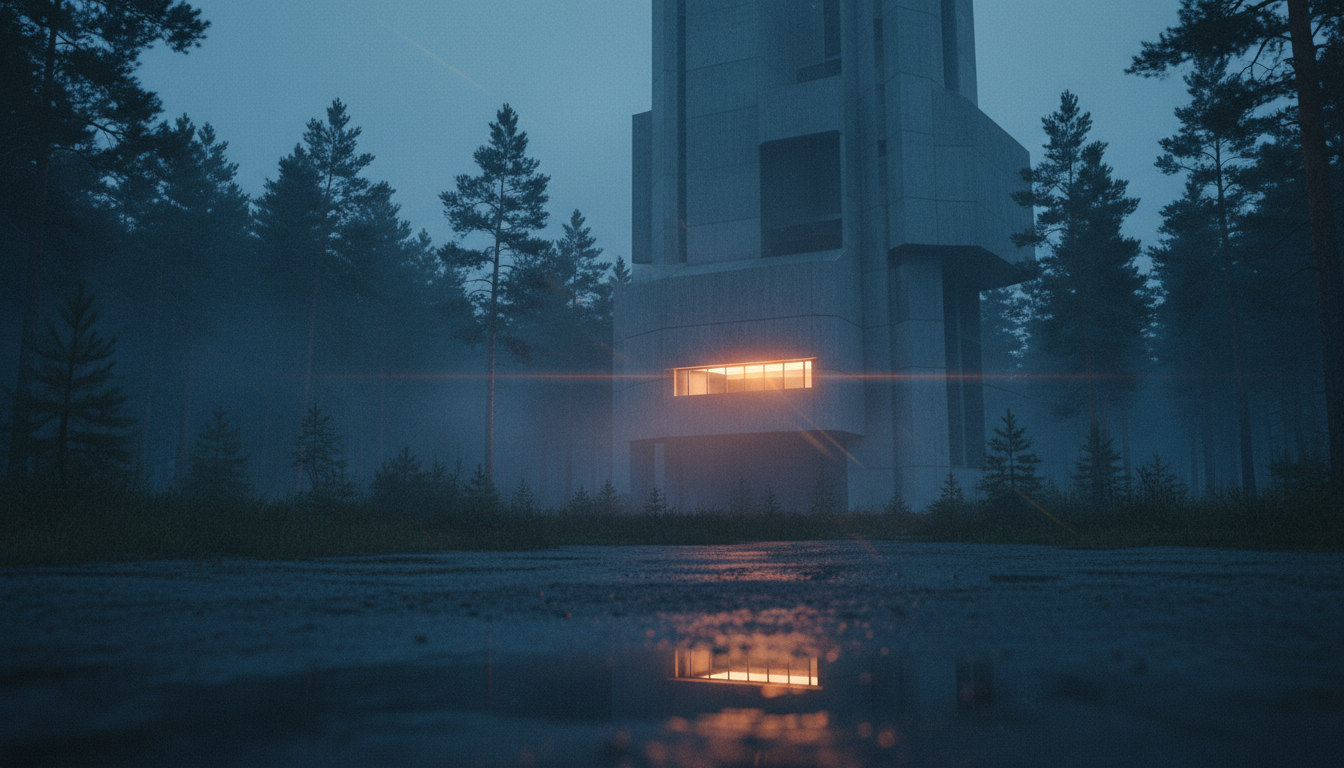
When directing AI-generated video, the most common trap is the unmotivated, weightless wide shot. Ask any major AI video model for an establishing shot of a city, a desolate outpost, or an ancient castle, and it will almost certainly deliver a hyper-smooth, floaty camera flyover. This "WebGL drone syndrome" instantly breaks immersion, signaling to the viewer's subconscious that they are looking at a virtual simulation rather than a physical camera package operated by a human crew on a real set.
At Montagea, we believe that high-substance AI filmmaking requires treating these generators with the same physical constraints you would apply to a physical production. To build genuine narrative tension, establish a believable sense of place, and transition seamlessly into your scenes, you must force the generator to respect real-world optics, mechanical camera rigs, and atmospheric physics. Grounding your establishing shots is not about adding more detail; it is about introducing the friction, gravity, and visual imperfections that make an image feel real.
The Gravity Problem: Why AI Establishing Shots Feel Weightless
The primary reason default AI establishing shots feel synthetic is the lack of physical inertia. AI models are trained on vast datasets of aerial drone footage, video game flythroughs, and stock footage. Because the AI does not understand the physical mass of a camera, a crane arm, or the wind resistance acting against a helicopter, it defaults to mathematically perfect, frictionless camera paths. The resulting shot moves at a constant speed, makes impossible 90-degree turns, and displays zero vibration, completely removing the human perspective.
To combat this, filmmakers must deliberately prompt physical camera constraints. In traditional cinema, an establishing shot is rarely a free-floating drone flight unless the story specifically demands a god-like perspective. Instead, directors rely on heavy mechanical rigs: a tripod pan from a high vantage point, a slow lateral dolly along a ridge, or a massive crane shot that begins high and slowly descends. These movements carry physical weight because the machinery behind them has mass, momentum, and limits.
Montagea's approach to AI filmmaking prioritizes these deliberate, grounded camera movements over generic, AI-generated spectacle. By restricting the virtual camera's freedom of movement, you force the AI to focus on the environmental details, lighting shifts, and internal motion of the scene. This restraint creates a tangible sense of presence, transforming a disposable digital asset into a deliberate, narrative-driven frame.
The Anatomy of a High-Substance Establishing Prompt
To consistently generate grounded establishing shots, you must move away from conversational prompts like "epic wide shot of a futuristic city." Instead, use a structured, modular prompt formula that addresses the physical mechanics of the shot. By breaking your prompt down into distinct structural components, you can control the camera rig, the subject, the environment, and the lighting with predictable accuracy.

Deconstructing the Four-Part Formula
A reliable formula for physical establishing shots consists of four core pillars: Camera Rig + Architectural/Natural Subject + Atmospheric Occlusion + Lighting Direction. Each of these components acts as a constraint that overrides the AI's tendency to generate generic, computer-generated imagery.
The first pillar, the Camera Rig, dictates the camera's physical mounting and height. Specifying the camera height is critical because it establishes the emotional tone of the scene. For example, prompting a "low-angle camera on a heavy-duty tripod looking up" immediately conveys power, intimidation, or mystery, making a building or landscape loom over the viewer. Conversely, a "high-altitude, fixed-angle helicopter mount" suggests clinical detachment, surveillance, or isolation. When you define the rig, you define how the audience is physically positioned within the world.
The remaining pillars build out the spatial reality. The Subject defines the central structural anchor. Atmospheric Occlusion introduces physical air density (such as dust, haze, or fog) to establish depth. Finally, Lighting Direction defines how shadows fall across the scene, carving out three-dimensional geometry and preventing the flat, evenly lit look common in low-effort AI generations.
Controlling Light and Air: Atmosphere and Scale
In the real world, we perceive scale through depth cues provided by the atmosphere. The farther away an object is, the more air, dust, and moisture sit between it and the camera lens. This phenomenon, known as atmospheric occlusion, causes distant objects to lose contrast, shift color temperature, and soften in detail. AI generators often struggle with this, rendering background elements with the same sharp contrast and high saturation as the foreground, which flattens the image and destroys the illusion of scale.
To establish true depth layers, you must explicitly prompt atmospheric elements. Introducing terms like "volumetric light shafts," "drifting low-altitude mist," "fine desert dust motes," or "industrial smog" forces the AI to render layers of air density. This separation between your foreground, midground, and background instantly signals massive physical scale to the viewer's eye.
Additionally, you must prompt for tactile, highly specific architectural details to prevent the AI from generating smooth, plastic-like surfaces. Instead of prompting for a "concrete building," specify "weathered concrete with water stains, micro-fractures, and exposed aggregate." This level of texture gives the light something physical to catch. Pair this with directional lighting—such as "low-sun side-lighting" or "strong backlighting during the golden hour"—to cast long, dramatic shadows that trace the physical contours of your environment, revealing its true three-dimensional geometry.
Camera Mechanics: Translating Real Jibs and Pull-Backs to AI Prompts
To make your establishing shots feel truly cinematic, you must translate real-world camera machinery into your prompt structure. Simple prompts like "zoom out" or "pan right" are often interpreted by AI as digital scaling or artificial sliding, which lacks the subtle perspective shifts of a physical camera move. Instead, focus on multi-axis movements that simulate heavy production gear.
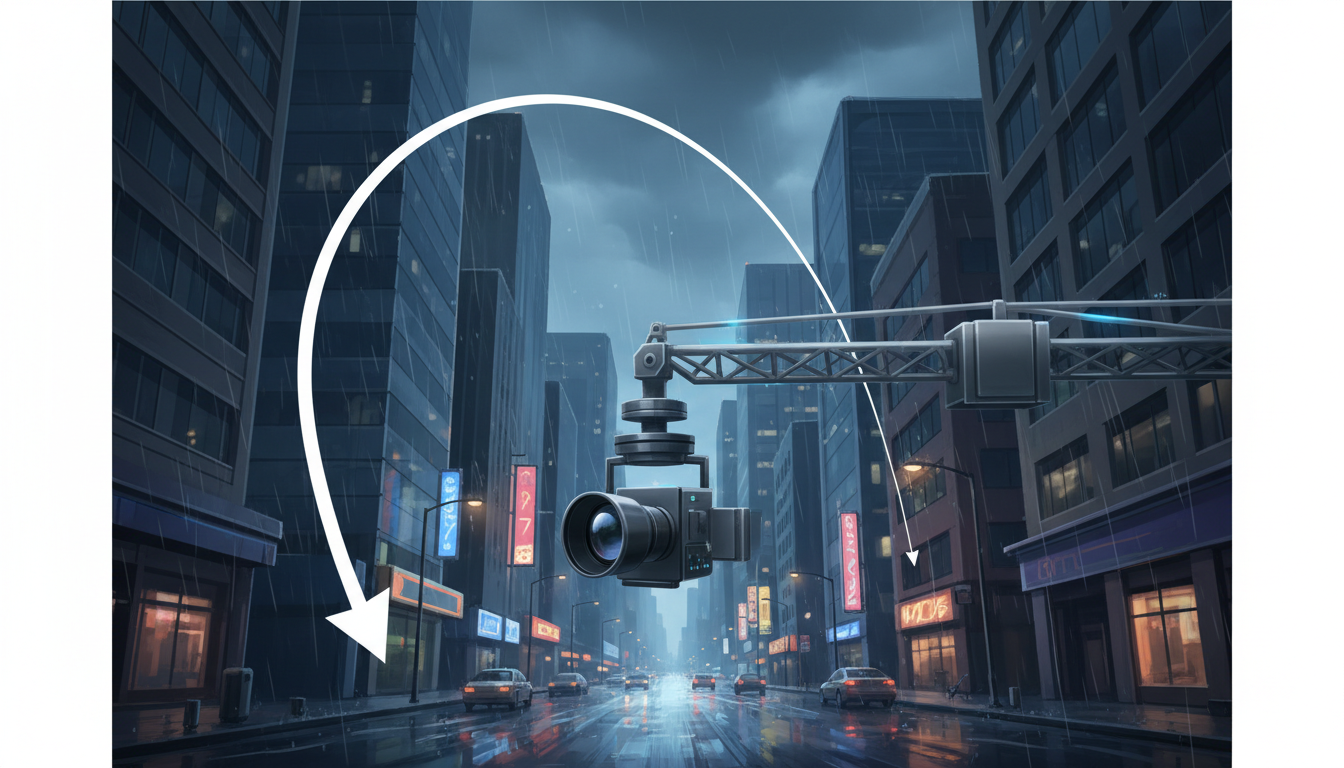
For instance, instead of a basic wide drone shot, you can prompt a heavy crane movement. By simulating authentic crane and jib movements to give the camera physical weight, you instruct the AI to lower the camera altitude while tilting up, creating a complex, parallax-heavy shot that feels grounded in physical space. The shifting perspective of the foreground elements against the background is a powerful visual cue that a physical camera is moving through a real environment.
Another highly effective technique is mastering the cinematic pull-back reveal to introduce your setting. A pull-back reveal starts on a tight, high-texture detail—such as rain dripping off a rusty chain-link fence or a single flickering streetlamp—and slowly moves backward to reveal the massive scale of the surrounding environment. This movement establishes a clear spatial relationship between the micro-details of your world and the macro-scale of your setting, drawing the audience into the scene with a deliberate, narrative-driven camera path.
Spatial Continuity: Linking the Establishing Shot to the Next Cut
An establishing shot does not exist in a vacuum; its primary job is to prepare the audience for the narrative scene that immediately follows. A common issue in AI filmmaking is the "spatial disconnect," where an establishing shot of a building looks entirely different from the interior or medium shots that follow, breaking the viewer's spatial orientation and destroying the narrative flow.
To maintain spatial continuity, you must anchor your shots using consistent color palettes, lighting cues, and architectural elements. If your establishing shot features a brutalist concrete research facility with warm, orange light spilling from a single third-floor window, that exact color contrast (cold grey concrete vs. warm amber light) must carry over into the subsequent interior shots. You can achieve this by using advanced first and last frame workflows to bridge the gap between shots, ensuring that the final frame of your wide shot naturally aligns with the starting geometry, lighting direction, and color tone of your closer angles.
Furthermore, you must design your shots while keeping the characters' physical placement in mind. Even in a wide establishing shot, the framing should hint at where the action will take place. By establishing these spatial boundaries early, you make the process of maintaining strict spatial continuity and eyeline matches across cuts significantly easier during the editing phase, allowing your audience to intuitively understand where characters are positioned relative to the wider environment.
The AI Establishing Shot Prompt Matrix
To help you implement these concepts in your own projects, we have compiled a prompt matrix featuring highly specific, production-ready recipes for different cinematic genres. These formulas are designed to override the default, floaty AI tendencies and deliver grounded, high-substance establishing shots.
| Genre | Camera Rig Prompt | Lighting & Atmosphere Prompt | Resulting Narrative Mood |
|---|---|---|---|
| Neo-Noir | Low-angle camera on a heavy tripod, slow lateral dolly pan across a rain-slicked street. | High-contrast side-lighting from flickering neon signs, volumetric mist, heavy rain casting long reflections. | Claustrophobic, mysterious, and deeply atmospheric; establishes urban isolation. |
| Sci-Fi Brutalism | Heavy crane shot slowly descending from a high altitude, tilting up toward a massive concrete monolith. | Overcast, diffused daylight, heavy atmospheric occlusion, low-altitude fog partially obscuring the background. | Ominous, monumental, and sterile; emphasizes the overwhelming scale of the architecture. |
| Gothic Horror | Slow, deliberate jib-arm push-in, starting low to the ground and rising slightly to frame a dilapidated manor. | Backlit by a pale, low-hanging moon, harsh shadows, drifting low-lying ground fog, high-contrast monochrome tones. | Foreboding, decaying, and tense; suggests the environment itself is a hostile character. |
| Sun-Drenched Indie Drama | Eye-level handheld camera with subtle organic sway, slow pan across an empty coastal highway. | Warm, low-angle golden hour sunlight, heavy lens flare, fine dust motes drifting in the warm air, soft pastel color grade. | Melancholic, nostalgic, and intimate; establishes a reflective, character-driven tone. |
By applying this structured approach to your prompting workflow, you can move past the generic, floaty drone flyovers that plague early AI cinema. Treating your AI generator like a physical camera package—complete with weight, mechanical limitations, and atmospheric interference—is the key to creating establishing shots that feel grounded, deliberate, and genuinely cinematic.
How do I stop my AI establishing shots from looking like video game graphics?
To prevent a synthetic, video game-like appearance, you must prompt for physical imperfections and complex lighting. Avoid generic terms like "photorealistic" or "ultra-detailed." Instead, prompt for specific material textures (e.g., "weathered brick with salt efflorescence," "stained concrete with micro-cracks") and atmospheric occlusion (e.g., "volumetric dust," "low-altitude haze"). This forces the AI to render realistic light dispersion and surface friction, which breaks the clean, plastic look of digital renders.
What are the best camera movement terms to use for wide shots in AI video generators?
Avoid basic terms like "zoom out" or "pan," which often result in flat, digital scaling. Instead, use terms that imply heavy, physical machinery, such as "slow crane down and tilt up," "heavy-duty tripod lateral pan," "slow dolly track along the ground," or "jib-arm push-in." These prompts force the AI to simulate realistic camera weight, inertia, and complex multi-axis perspective shifts (parallax).
How can I keep the architecture consistent between my establishing shot and close-ups?
Maintain consistency by carrying over specific architectural details, lighting directions, and color palettes between prompts. If your establishing shot features a "brutalist concrete bunker under overcast sky with orange interior light," your close-up prompts should include "brutalist concrete wall texture, diffused overcast lighting, warm orange spill light from side frame." Using first and last frame keyframing workflows in advanced generators also helps lock down physical geometry across cuts.
Should I prompt atmospheric effects like fog or rain in my establishing shot?
Yes, absolutely. Atmospheric effects are essential for establishing scale and depth. In the real world, air density scatters light over long distances, a phenomenon known as atmospheric occlusion. Prompting for "volumetric light shafts," "fine mist," "drifting dust," or "heavy rain" creates distinct visual layers between the foreground, midground, and background, which instantly signals massive physical scale to the viewer.



