
The Multi-Shot Sequence Protocol: Mastering Seedance's Multi-Prompt Workflows for Coherent AI Filmmaking
Stop stitching isolated clips in post-production. Discover how to use Seedance's multi-prompt architecture to direct continuous, multi-shot sequences with precise camera transitions, strict visual continuity, and professional-grade timing.
For years, AI filmmaking has been a process of fragmentation. Directors have had to generate dozens of isolated, single-shot clips, crossing their fingers that lighting, character geometry, and camera angles would align well enough to survive the editing bay. This brute-force approach to visual continuity is not only time-consuming but fundamentally limits the narrative flow of complex scenes, forcing filmmakers to rely on heavy post-production workarounds to mask visual discrepancies.
Seedance’s multi-prompt architecture changes this paradigm by turning the AI video generator into a continuous, multi-shot virtual camera system. By programming frame-specific prompt shifts and camera transitions within a single generation timeline, filmmakers can direct entire cinematic sequences that maintain environmental cohesion from the first frame to the last. This protocol establishes a systematic approach to timing, transitions, and continuity, moving past basic prompt engineering into true virtual scene direction.
The Transition from Single-Frame Prompts to Multi-Shot Sequences
Traditional AI video workflows require generating dozens of individual clips and hoping they match in post-production. This often results in a disjointed viewing experience where characters subtly shift features, lighting directions change between cuts, and the overall atmosphere feels disconnected. When you are forced to stitch together separate generations, you lose the fluid camera transitions that define high-end cinematography—such as whip pans, continuous push-ins, and motivated match cuts.
Seedance's multi-prompt engine solves this by allowing creators to define multiple text prompts along a single generation timeline. Instead of rendering a single four-second clip, you can map out a ten-second sequence where the camera moves from a wide establishing shot, transitions through a physical obstacle, and settles into a tight close-up of a character. This continuous generation preserves the underlying latent space of the environment, resulting in natural transitions and continuous camera movements that feel physically grounded.
At Montagea, we believe mastering this multi-shot workflow is essential for moving AI filmmaking from chaotic, luck-based generations to deliberate, structured scene direction. To maximize efficiency, you can integrate this sequence workflow into your broader multi-model shot list strategy to assign the right cinematic tasks to the best engines, using Seedance specifically for complex, continuous multi-shot narratives that require unbroken spatial awareness.
Anatomy of a Seedance Multi-Shot Prompt
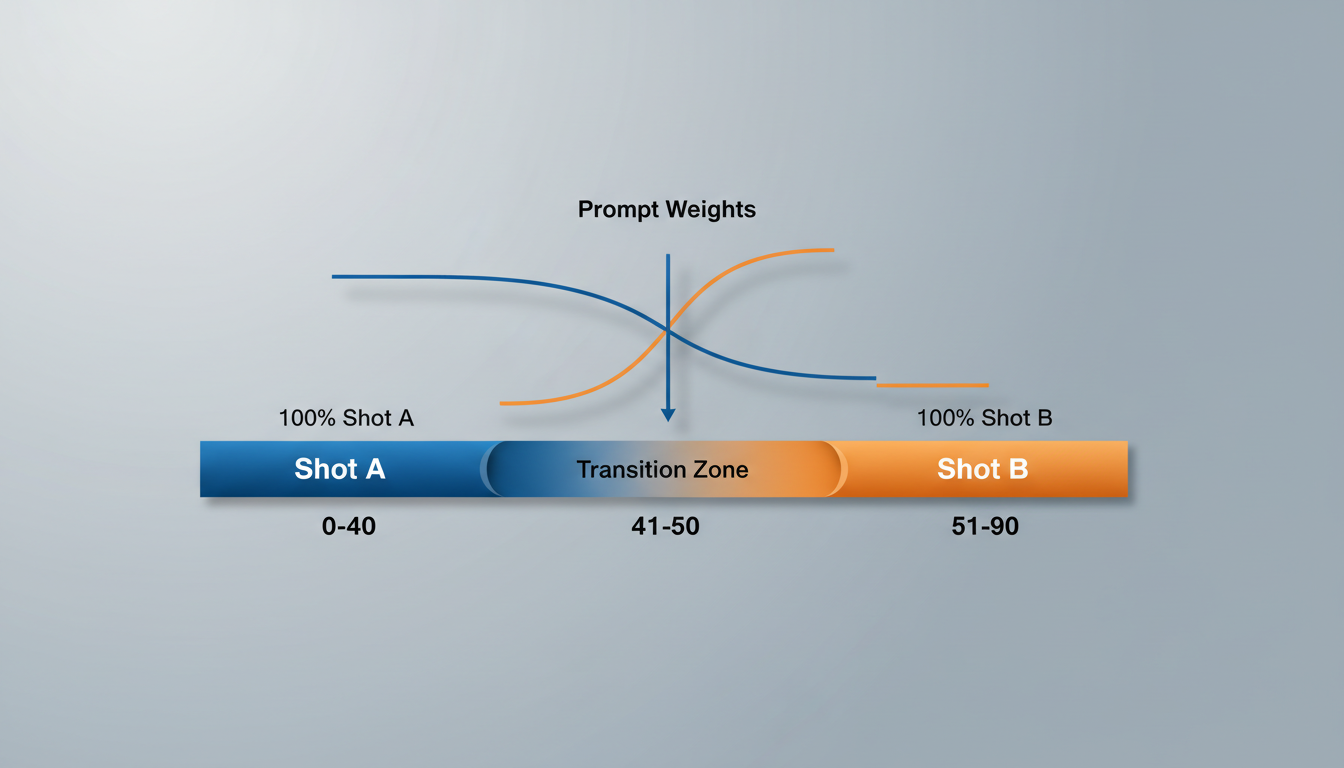
To control a multi-shot sequence, you must understand how Seedance interprets time. Unlike standard generators that accept a single prompt block, Seedance utilizes a timeline syntax where you allocate specific frame budgets to individual actions, transition zones, and camera behaviors. A standard 90-frame sequence (roughly 3.75 seconds at 24fps) must be mathematically partitioned to prevent visual chaos.
Structuring the Frame Budget and Transition Zones
A successful multi-prompt sequence relies on three distinct phases: the initial shot duration, the transition zone, and the target shot duration. If you transition too quickly, the model will produce a jarring digital morph; if you transition too slowly, the scene will look like a surreal, slow-motion cross-dissolve. The transition zone acts as a buffer where the AI interpolates the visual data of Shot A into Shot B.
Maintaining environmental consistency during this interpolation requires balancing global prompts and local shot prompts. The global prompt defines the unchanging elements of the scene—such as the lens profile, lighting style, color grade, and overall setting. The local prompts define the specific framing and action of each shot. For example, your global prompt might dictate a 35mm anamorphic look in a rain-slicked cyberpunk alleyway, while your local prompts shift from a "wide shot of the empty street" to a "low-angle close-up of a detective."
To prevent the visual elements of Shot A from bleeding inappropriately into Shot B, you must balance prompt weights. If the weight of Shot A's prompt remains too high during the transition zone, features of the first shot—like a neon sign or a background vehicle—will awkwardly morph into the detective's face or clothing. Gradually tapering the prompt weight of Shot A to zero while scaling Shot B's weight to 100% over a 10-to-12 frame window ensures a clean visual break.
Defining Shot Boundaries and Camera Transitions
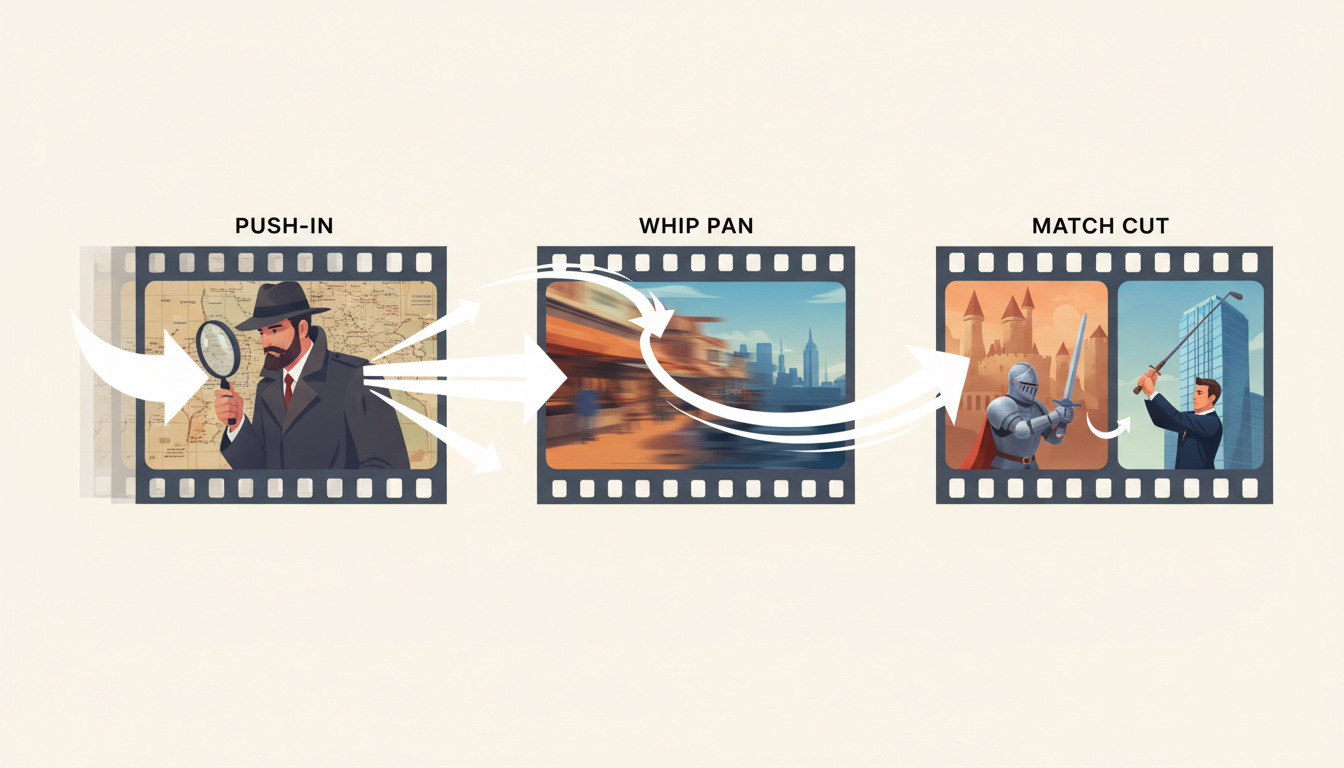
Executing a transition within a single generation requires writing explicit transition cues that instruct the model to simulate physical camera movements. Rather than letting the AI decide how to get from Shot A to Shot B, you must prompt the transition as a high-speed camera move—such as a whip pan, a rapid push-in, or a match cut. This movement creates natural motion blur that masks the underlying structural shift between the two shots.
Managing the "morphing" effect is the primary challenge of this workflow. To keep transitions looking cinematic rather than like a digital cross-dissolve, you should prompt physical occlusions or rapid camera paths. For example, prompting the camera to pass behind a dark pillar (an occlusion) allows the AI to cleanly swap the background geometry on the other side of the pillar, resulting in a seamless wipe transition.
Motion scale settings play a critical role here. For deep-dives into controlling camera motion, our kinetic vector protocol for tracking shots offers a blueprint for drift-free camera paths. In Seedance, you must balance these motion scale settings to ensure the transition is dynamic without breaking the physical geometry of the scene. A motion scale that is too low will cause the transition to stall, resulting in a muddy morph, while a scale that is too high will cause the visual assets to tear and pixelate.
The Seedance Transition Matrix: A Sequence Blueprint
To streamline your production workflow, use the following transition matrix to execute specific cinematic cuts. This framework provides tested formulas for frame timing, camera motion prompts, and motion scale settings.
| Transition Type | Frame Allocation | Camera Motion Prompt | Motion Scale Setting |
|---|---|---|---|
| The Push-In Cut | Shot A: 0–35 Transition: 36–42 Shot B: 43–90 | "rapid camera push-in, sudden focal shift, dramatic dolly-in" | High (8/10) |
| The Pan-To-Reveal | Shot A: 0–30 Transition: 31–45 Shot B: 46–90 | "whip pan right to reveal, heavy motion blur, camera sweep" | Very High (9/10) |
| The Match Action Cut | Shot A: 0–40 Transition: 41–48 Shot B: 49–90 | "fast camera tilt down following the falling object, matched motion" | Medium (6/10) |
Sequence Testing and Refining Checklist
Before committing your computing budget to high-resolution renders, always execute a low-resolution test pass using this sequence checklist:
- Verify Frame Timing: Ensure the transition zone is long enough to avoid abrupt clipping but short enough to prevent visual "melting."
- Assess Global Consistency: Check that the color palette, lens distortion, and grain structure remain identical across both shot segments.
- Monitor Edge Distortion: Watch the edges of the frame during the transition; if you see extreme warping, lower the motion scale by one increment.
- Audit Prompt Bleed: Ensure that specific objects from Shot A do not manifest as artifacts or textures on characters in Shot B.
Mitigating Drift Across Multi-Shot Prompts
The most persistent obstacle in multi-shot prompting is character and environmental drift. Because AI models generate frame-by-frame based on probabilistic patterns, the transition from one camera angle to another can cause the model to lose track of key visual details. A character’s jacket might change from leather to denim, or their facial structure might shift during a medium-to-close-up transition.
To mitigate this, you must anchor your prompts with highly specific, unchanging details. Avoid generic terms like "a man in a coat." Instead, define precise textures, materials, and unique markers: "a 35-year-old man with a jagged scar on his left cheek, wearing a matte black Gore-Tex jacket with a silver metallic zipper." By repeating these exact descriptive anchors across both local prompts, you give the model a strict set of rules to follow during the transition phase.
Additionally, utilizing Seedance's image-to-video capabilities provides a physical anchor for your sequence. To establish a rock-solid visual baseline before starting your multi-shot sequence, consider generating a character turnaround sheet to lock in your subject's geometry. You can use a cropped frame from this turnaround sheet as the starting image-to-video reference for Shot A, ensuring the character begins the sequence with perfect structural fidelity.
Integrating Multi-Shot Sequences into Your Broader Production Pipeline
A raw multi-shot generation from Seedance is rarely the final stop for a professional filmmaker. To achieve a polished, theatrical look, you must integrate these continuous sequences into your traditional post-production pipeline. Once the generation is complete, bring the file into your non-linear editor (NLE) of choice, such as DaVinci Resolve or Premiere Pro.
In the edit suite, slice the generated sequence precisely at the peak of the transition. While Seedance generates the transition continuously, trimming a 10-frame AI transition down to a 2-frame hard cut or a 4-frame whip-pan edit will significantly tighten the pacing and hide any minor interpolation artifacts. This hybrid approach combines the spatial consistency of a continuous AI generation with the surgical precision of traditional editing.
Finally, focus on sound design and upscaling. Continuous camera movements require continuous, dynamic audio to sell the illusion of physical space. Layering directional sound effects—such as low-frequency camera whooshes, spatialized ambient hums, and Foley effects that pan across the stereo field—distracts the viewer's eye from minor visual inconsistencies. When paired with high-quality temporal upscaling, your multi-shot Seedance sequences will seamlessly blend into any professional film or commercial project.
How do I prevent character drift between shots in a Seedance multi-prompt sequence?
To prevent character drift, define highly specific, unchanging anchor details in both your global and local prompts. Specify exact clothing materials, age, unique physical markers (like scars or hairstyles), and lighting angles. Additionally, starting your sequence with a high-quality character reference image via Seedance's image-to-video feature establishes a strong geometric baseline that the model can maintain across subsequent shot transitions.
What is the optimal frame length for a transition between two shots in Seedance?
The optimal transition zone is typically between 6 and 12 frames. A transition shorter than 6 frames can cause jarring visual pops or geometric tearing, while a transition longer than 12 frames often results in a slow, surreal "morphing" or "melting" effect where elements of the two shots awkwardly coexist in the same space.
Can I use different image prompts for each shot in a single multi-shot generation?
Yes, but you must manage the transition carefully. When using different image prompts for Shot A and Shot B, program a transition zone where the prompt weights shift gradually. To avoid a messy digital cross-dissolve, use a camera movement cue (like a whip pan or passing behind an obstacle) to mask the moment the model shifts its primary reference from the first image to the second.
How do I prompt a clean match cut instead of a morphing transition in Seedance?
To execute a clean match cut, maintain identical composition, scale, and motion vectors between the subject in Shot A and Shot B. In your transition prompts, specify rapid camera movement or motion blur (e.g., "sudden camera drop, motion blur") at the exact transition frames, and ensure the global style prompt remains completely unchanged to keep the lighting and color grading consistent.



