
The Vector Anchor: How to Prevent Logo and Typography Distortion in AI Video Production
Pure AI video generators cannot maintain pixel-perfect vector geometry. Discover how to combine strategic prompting with professional post-production tracking to composite flawless, stable brand assets into AI-generated scenes.
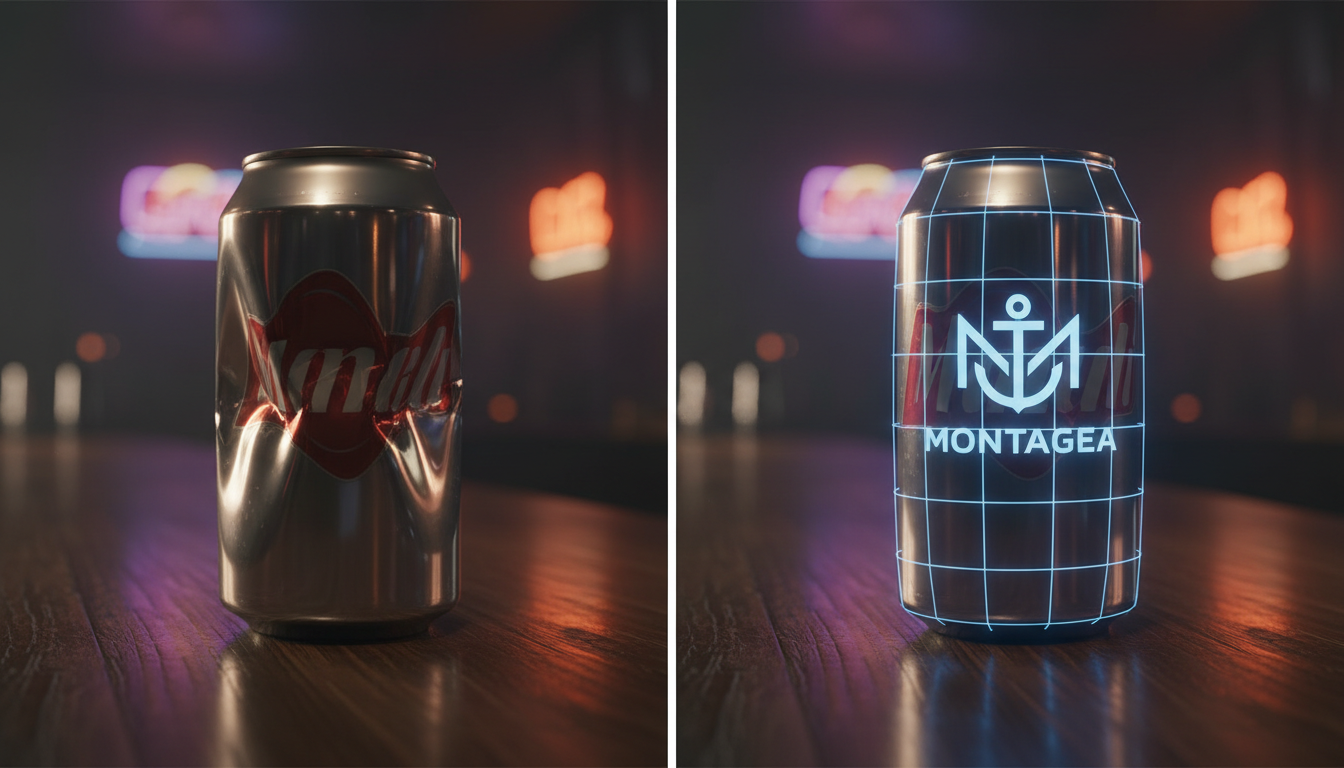
AI video generators have fundamentally transformed how we conceptualize environments, simulate cinematic lighting, and draft complex camera movements. However, for commercial directors and video editors, these tools present a major technical hurdle: they are notoriously incapable of maintaining pixel-perfect vector geometry. If you attempt to render a brand logo directly within a generative AI model, you will almost certainly watch the typography warp, melt, and flicker across frames, rendering the footage useless for professional commercial distribution.
At Montagea, we view this technological limitation not as a creative dead end, but as a clear boundary line where generative AI must hand off to traditional post-production precision. To produce commercial-grade brand videos, creators must stop expecting AI models to render complex brand marks natively. Instead, the solution lies in a hybrid workflow: prompting for clean, trackable "blank slates" and compositing vector assets in post-production. This guide details how to establish a robust vector anchoring pipeline that bridges the gap between generative AI capabilities and strict commercial brand standards.
The Typography Trap: Why AI Models Warp Brand Marks
To solve the issue of text distortion, we must first understand why it occurs. Current AI video models—whether based on diffusion architectures or generative transformers—do not operate with an understanding of geometry, typography, or vector mathematical paths. Instead, they predict pixels based on statistical probability. They do not know what a "letter" or a "logo" is; they only know which pixel clusters frequently appear next to each other in their vast training datasets.
When an AI model generates motion, its temporal consistency algorithms analyze global changes across frames. While these algorithms can successfully track large-scale motion like a camera pan or a walking subject, they struggle with the micro-geometry of typographic serifs, kerning, and sharp vector edges. As a result, the latent space shifts slightly with every frame, causing a phenomenon known as latent drift. A crisp line on a brand mark will liquefy, a letter "e" will slowly morph into an "o," and fine lines will flicker uncontrollably.
Relying on raw prompts to render recognizable commercial assets like the Nike Swoosh, the Coca-Cola script, or custom corporate typography is a guaranteed way to fail commercial quality control (QC) tests. Brand guidelines demand pixel-perfect consistency down to the exact hex code and vector coordinate. Because generative models cannot guarantee this, attempting to generate logos natively is a waste of render compute and production time.
Prompting the Blank Slate: Designing for Post-Production Compositing
The secret to successful AI brand integration is to design your scenes with the final composite in mind. Instead of prompting for a "branded product," you should prompt for a clean, high-contrast, unbranded canvas that is optimized for post-production tracking software. This approach prevents the AI from generating unwanted typographic gibberish while providing clear visual anchors for your compositing tools.
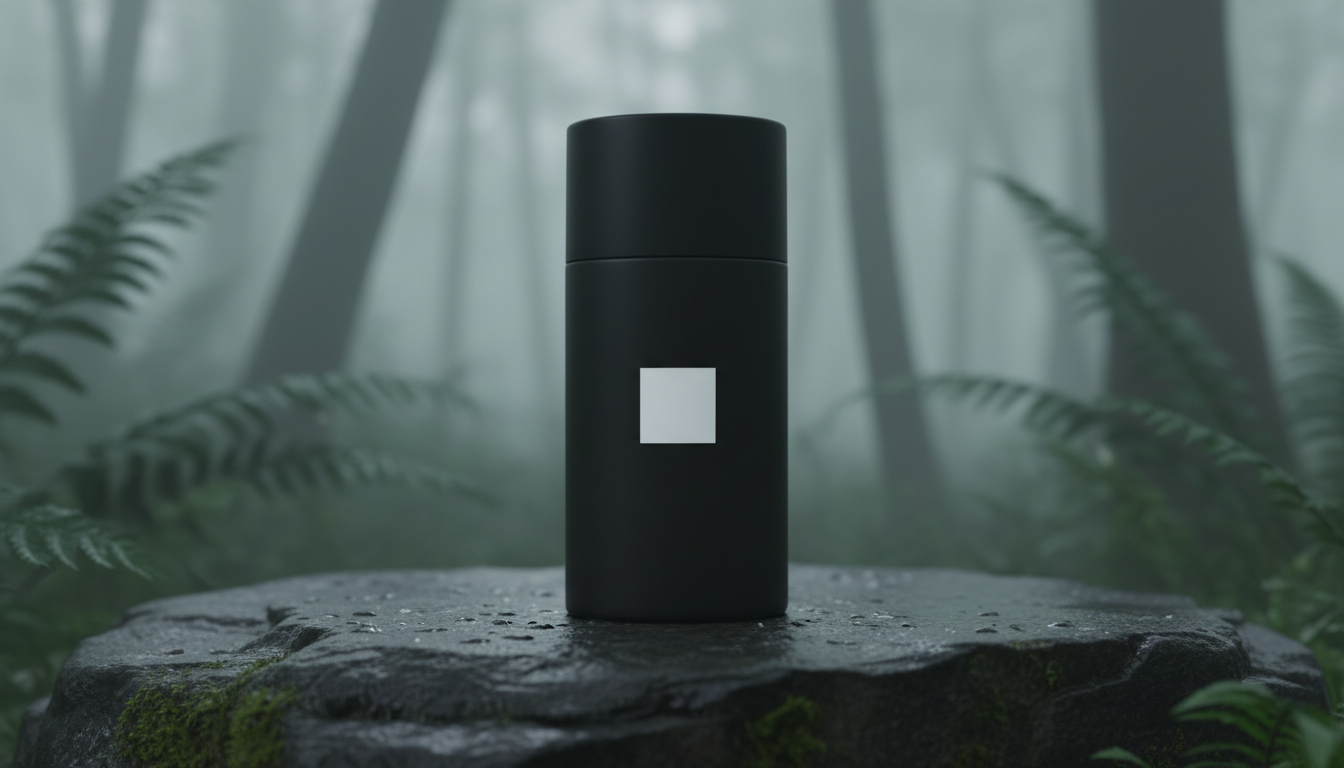
When writing your prompts, use descriptive modifiers that establish flat, matte, or clean surfaces. For example, instead of prompting "a can of energy drink with a cool logo," use a prompt like: "A close-up shot of a sleek, matte-black aluminum beverage can on a wet stone counter, completely blank surface, no text, clean design, cinematic lighting." This gives you a pristine canvas without any unpredictable AI-generated text artifacts.
To make tracking even easier, you can prompt high-contrast placeholder geometry directly onto your subjects. Prompting a simple geometric shape—such as a solid white circle or a matte black square in the center of a t-shirt or packaging box—provides a perfect high-contrast target for planar tracking software. The AI will render the physics of the scene (including lighting and fabric folds) around this placeholder shape, which you can easily mask and replace in post.
Optics and focus are also critical. If your target surface is too blurry, your tracking software won't have enough edge contrast to lock onto. To prevent your tracking targets from dissolving into digital noise, master the art of manipulating cinematic depth of field during generation. Keeping your target area within a sharp, clean focal plane ensures your tracking markers remain highly visible. Additionally, composition format matters: when translating horizontal compositions to vertical formats, ensuring your tracking targets remain within the safe action zone is critical. This guarantees that your tracking coordinates do not get cropped out or distorted during aspect ratio conversions.
The Hybrid Compositing Pipeline: Step-by-Step
Once you have rendered a clean, stable AI plate with a well-defined tracking target, you are ready to transition to your post-production suite. Whether you use Adobe After Effects, DaVinci Resolve (Fusion), or Nuke, the core hybrid compositing workflow remains consistent.
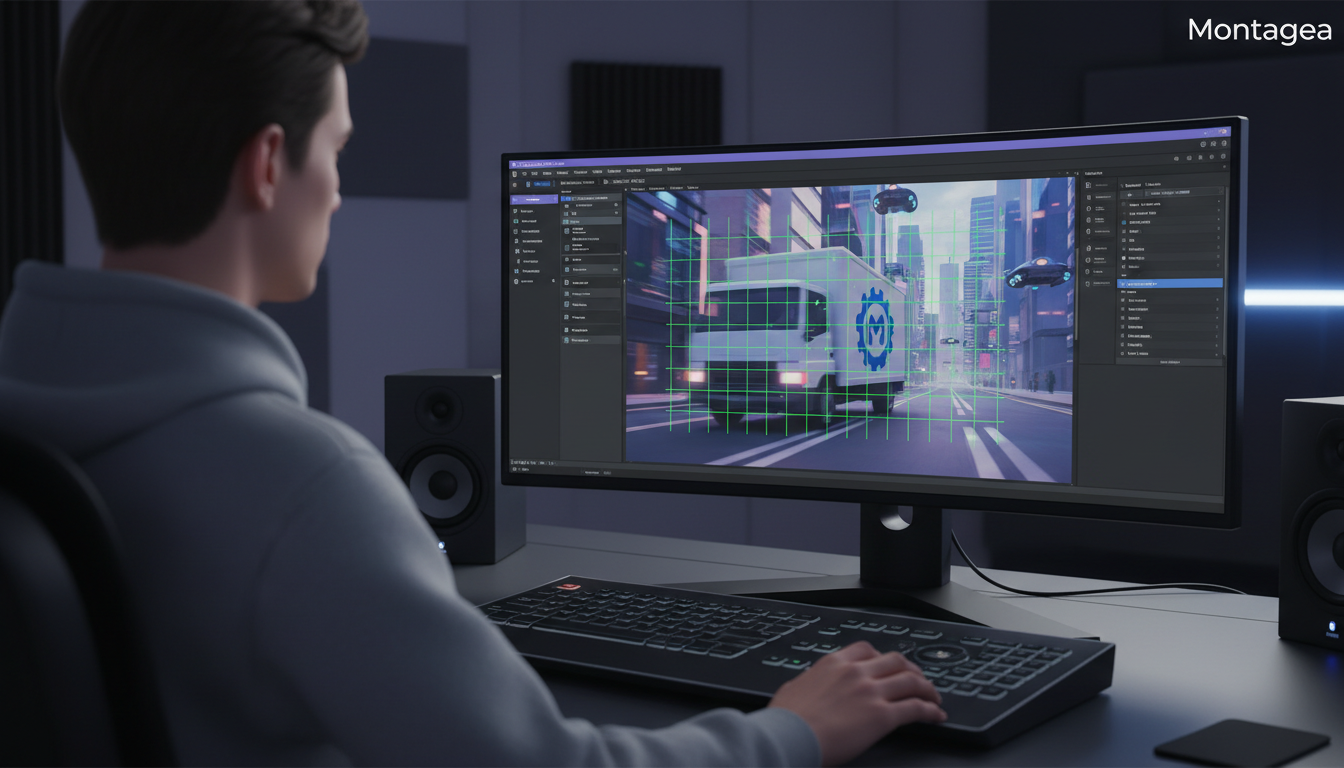
Step 1: Export and Clean the Plate
Export your AI-generated video at its native resolution and maximum bitrate. Before applying any tracking, inspect the footage for minor AI frame anomalies. If there are sudden, single-frame glitches on your target surface, use a paint or clone tool to clean up the frame, creating a stable "clean plate" baseline.
Step 2: Choose and Execute the Tracking Method
Select the tracking methodology that matches your camera and subject movement. Because AI footage can sometimes have minor organic warping, choosing the right tracking algorithm is essential for a locked-on result.
Tracking Method Comparison Matrix
| Tracking Method | Best Use Case | Tracking Target | Pros for AI Plates | Cons for AI Plates |
|---|---|---|---|---|
| Planar Tracking (e.g., Mocha Pro) | Flat surfaces like signs, screens, walls, and rigid packaging. | A defined surface area with high-contrast texture. | Excellent at handling perspective shifts, shear, and rotational movement. | Can struggle with highly organic, non-rigid surfaces like loose clothing. |
| 3D Camera Tracking (e.g., Resolve/After Effects) | Complex camera moves (dolly, truck, crane) through a 3D environment. | The entire background scene geometry. | Allows you to place logos in physical 3D space with correct depth. | Requires static environments; moving subjects will confuse the solver. |
| Point Tracking (Classic 1-Point/2-Point) | Simple, flat, translational movement with minimal rotation. | High-contrast, tiny details (like a corner or a dot). | Very fast to set up and compute. | Does not account for perspective warping or surface deformation. |
Step 3: Integrate and Match the Scene Optics
Simply overlaying a raw, vector SVG file onto your tracked surface will look artificial. To make the logo look natively embedded in the scene, you must match the optical characteristics of the AI-generated plate:
- Match Lighting and Blending: Use blending modes like Multiply (for dark logos on light surfaces) or Screen/Add (for light logos). Apply a subtle gradient ramp to match the ambient lighting direction of the scene.
- Apply Displacement Maps: If your logo is placed on a textured surface, such as a canvas tote bag or a brick wall, use a displacement map driven by the luminance values of the underlying AI plate. This warps the vector logo slightly to follow the physical texture of the object.
- Match Motion Blur and Grain: AI generators often have unique grain structures and compression characteristics. Apply a matching camera noise or grain effect to your vector layer, and link your motion blur settings directly to the speed of your tracker.
Maintaining Brand Continuity Across Multiple Scenes
A single polished shot is rarely enough; commercial campaigns require visual cohesion across multiple scenes, cuts, and angles. Our guide on maintaining prop and brand continuity across cuts provides a framework for keeping physical details stable when cutting between different AI-generated environments.
When your campaign shifts from an extreme close-up to a wide shot, the relative size and positioning of your logo must remain mathematically consistent. If you are compositing a logo onto a physical asset (like a delivery truck or a product box) across five different shots, create a master 3D asset template or a standardized vector pre-composition. This ensures that the scale, kerning, and color grading of the logo do not vary from scene to scene, even if the underlying AI plates were generated with slightly different aesthetic styles.
Furthermore, pay close attention to dynamic reflections. If your scene features a camera moving past a glossy bottle, the reflections on the bottle's surface must pass over the composited logo naturally. You can achieve this by masking out the bright highlights of the original AI render and compositing them on top of your vector logo layer using a Screen or Lighter Color blend mode. This sandwich technique (AI Plate -> Vector Logo -> AI Highlights) creates a flawless illusion of physical depth.
Troubleshooting Matrix: Fixing Warped Elements in Existing Footage
If you have already rendered a beautiful, high-quality AI sequence but find that a text element or logo is warping or looking distorted, you don't necessarily have to re-render the entire shot. Use these professional troubleshooting techniques to salvage your footage:
- Problem: The AI generated weird, melting gibberish text on an otherwise perfect background.
Solution: Create a static clean frame in Photoshop or your editor's paint tool by cloning over the gibberish text. Mask this clean patch back over your moving footage, and track your clean vector logo on top of the patch. - Problem: The surface is organic (like a t-shirt fabric) and warping slightly, causing the tracked logo to slide.
Solution: Use a spline warper, mesh deformation tool, or a smart vector tracker (like Mocha's PowerMesh). These tools analyze surface deformation and allow your vector logo to bend, stretch, and wrinkle naturally along with the fabric folds. - Problem: High-speed camera movement is causing tracking points to lose their lock.
Solution: Manually keyframe the position of the logo during the fastest frames, and apply heavy directional motion blur. When motion blur is high, the human eye cannot perceive exact geometric alignment, allowing you to hide minor tracking discrepancies. If the tracking breaks completely at the end of a shot, consider using a simulated rack focus to blur out the background, naturally drawing the viewer's eye away from the edge of the screen.
By shifting your perspective away from all-in-one AI generation and adopting this hybrid, vector-anchored pipeline, you can confidently produce commercial-grade video content. This methodology respects the strengths of both technologies: utilizing generative AI for its unparalleled atmospheric and environmental creativity, while relying on the absolute precision of professional compositing to protect and elevate your brand identity.
Why does AI video turn text and logos into unreadable gibberish?
AI video models do not understand language, typography, or vector math. They predict pixels based on statistical probabilities from training data. Because they lack geometric constraints, they cannot maintain the sharp, consistent paths required for readable text, causing fine lines and letters to warp, melt, and drift over time.
Can I use ControlNet or IP-Adapter to force an AI video generator to render my logo perfectly?
While ControlNet and IP-Adapter can guide the initial layout of a logo in a static frame, they still struggle to maintain temporal consistency across multiple video frames. The logo will still suffer from slight frame-by-frame flickering and geometric drift. For true commercial-grade consistency, a hybrid compositing workflow remains the industry standard.
What is the easiest way to add a logo to an AI-generated t-shirt or hoodie?
Prompt the AI to generate a blank, solid-colored t-shirt with a high-contrast geometric placeholder (like a plain white circle on a black shirt). In post-production, use a planar tracker with mesh deformation capabilities (such as Mocha PowerMesh) to track the folds of the fabric, and then composite your vector logo over the placeholder.
How do I match the lighting and reflections of an AI scene on my composited vector logo?
Use blending modes like Multiply or Screen to let underlying textures bleed through. Additionally, extract the highlight/reflection pass from the original AI video plate by using a luma key, and composite those highlights on top of your vector logo to make it appear naturally integrated into the environment.



