
The Optics of Depth: How to Prompt Realistic Rack Focus in AI Video Production
A true rack focus is more than a simple blur filter; it is a physical, optical event. Learn how to structure prompts that force AI video generators to shift focus naturally between foreground and background elements without warping or morphing.
A true focus pull—or rack focus—is one of the most powerful tools in a cinematographer's kit. It doesn't just guide the viewer's eye; it establishes a physical, emotional relationship between two subjects separated by space, using the optical properties of glass, aperture, and light to tell a story without words. When executed correctly, it gives a scene an immediate sense of scale, high-end production value, and cinematic weight.
At Montagea, we believe that AI filmmaking platforms should be treated with the same physical rigor as traditional, high-end cinema cameras. When prompting modern generative video models like Runway Gen-3, Luma Dream Machine, or OpenAI's Sora, simply asking for a generic "focus change" often results in unnatural digital blurs or strange character morphing. To achieve a cinema-grade rack focus, creators must translate the physical mechanics of depth of field into precise, structured prompt architecture that respects the laws of optics.
The Optical Challenge: Why AI Struggles with Depth of Field
In traditional filmmaking, a rack focus shifts the focal plane along the Z-axis. As the camera assistant turns the follow focus ring, the physical glass elements inside the lens move. This movement changes which physical depths are sharp while altering the shape, size, and texture of the background bokeh. Light sources in the background expand into soft, circular, or anamorphic discs as they fall out of focus, a physical phenomenon governed by the lens aperture.
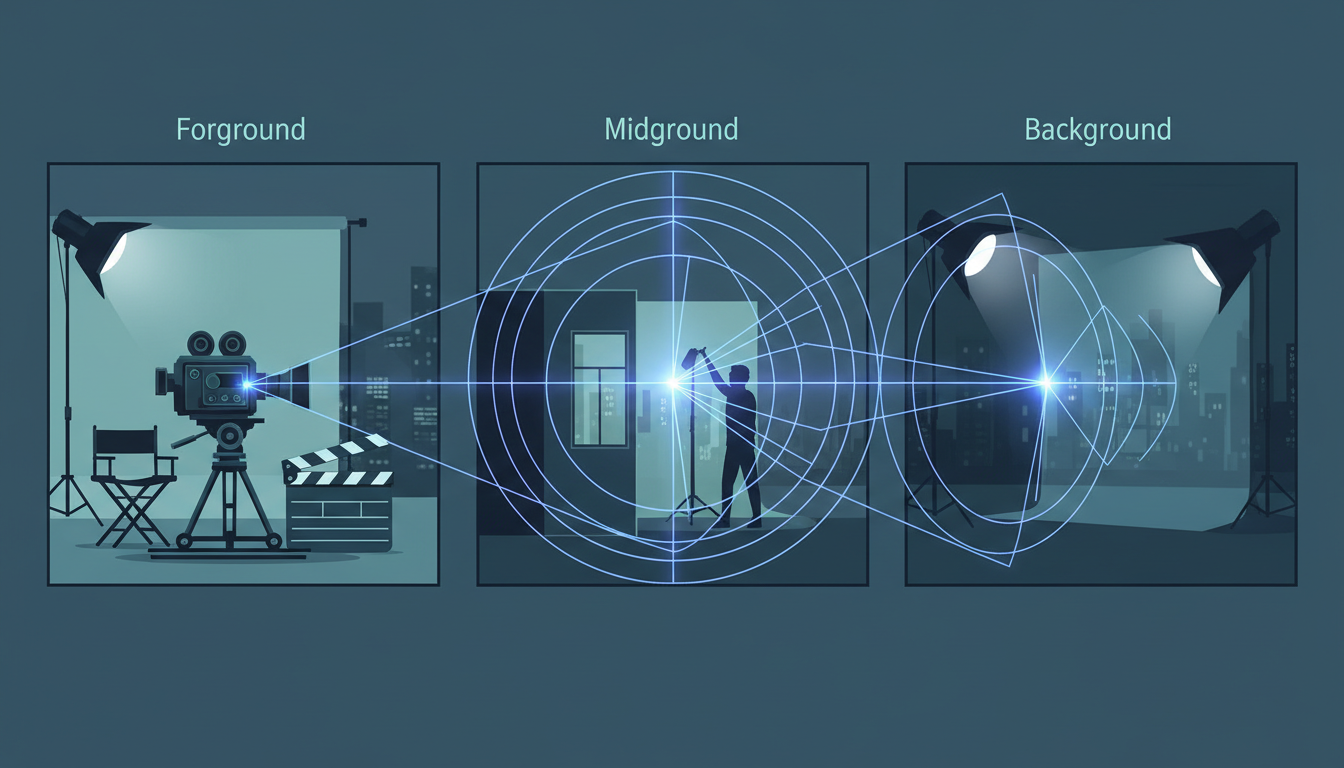
Generative AI video models do not inherently understand 3D space, physical glass lenses, or the refraction of light. Instead, they are trained on two-dimensional pixel grids. When faced with a prompt requesting a focus shift, an AI model often defaults to a superficial approximation: it cross-dissolves a basic Gaussian blur overlay across the image, or worse, it morphs the actual geometry of the subjects as they transition from blurry to sharp. This lack of physical awareness is what creates the dreaded "diorama effect," where scenes look like flat, painted layers sliding past one another rather than a continuous, deep physical environment.
To bypass these limitations, your prompts must describe the transition of sharpness between distinct depth planes rather than just asking for a "focus change." By describing the physical behavior of light and the specific states of the foreground and background, you force the AI's latent space to recalculate the pixels in a way that mimics real optical glass.
Crafting the Prompt: Vocabulary for Optical Focus Pulls
To get a clean focus pull, you must abandon conversational language and adopt the precise vocabulary of a camera department. AI models respond highly to technical terms that are heavily represented in high-quality film datasets. Using words like "shallow depth of field," "85mm lens at f/1.4," "focal plane shift," and "anamorphic bokeh" signals to the model that it needs to render a cinematic aesthetic rather than a flat smartphone video.
The Chronological Prompt Blueprint
Because AI video generators process motion and change over a timeline, your prompts should be structured chronologically. You need to guide the temporal diffusion process step-by-step, explicitly stating what the camera sees at the start, during the transition, and at the end of the shot. Here is a highly effective structural blueprint:
[Shot Type & Lens] + [Starting Focus State] + [The Focus Transition Action] + [Ending Focus State] + [Lighting & Bokeh Behavior]Let's look at a concrete example of this blueprint in action:
"A cinematic medium close-up shot, shot on an 85mm prime lens at f/1.8. Starts with crisp, sharp focus on a vintage pocket watch held in a detective's hand in the extreme foreground, while the detective's face in the background is heavily blurred with soft, circular bokeh. The camera remains completely still as a smooth, deliberate focus pull occurs; the pocket watch slowly defocusses, and the focal plane shifts deep into the background, bringing the detective's sharp, detailed eyes into perfect focus. The background light sources expand into beautiful, creamy bokeh discs during the transition."
By specifying the behavior of the bokeh and light during the shift, you give the AI generator a mathematical reason to recalculate the background pixels realistically, preventing the muddy, flat transitions common in lower-effort generations.
Image-to-Video (I2V) vs. Text-to-Video Focus Pulls
When producing AI video, you must choose between generating the shot entirely from text (Text-to-Video) or starting with a high-quality reference image (Image-to-Video). Both approaches have distinct advantages and drawbacks when it comes to executing a realistic focus pull.
| Workflow | Pros for Rack Focus | Cons & Limitations |
|---|---|---|
| Text-to-Video (T2V) | Gives the AI more freedom to calculate the transition from scratch; often results in smoother shifts in light and bokeh. | High risk of character, prop, and environmental inconsistency as the focus shifts. |
| Image-to-Video (I2V) | Allows you to lock in a perfectly composed starting frame with exact character features, props, and set design. | The AI may struggle to "un-blur" a background that is heavily blurred in the source image, or it may freeze the scene entirely. |
If you choose the Image-to-Video workflow, composition is your most powerful tool. You must feed the model a high-contrast starting image that features a clear, unmistakable separation between the foreground and background. If the starting image is flat, the AI will not have enough spatial information to understand where the depth planes lie.
Furthermore, keeping the subject still while the camera lens does the work is a delicate balancing act. This requires mastering the physics of prompting subtle motion to ensure only the focus shifts while the subject remains naturally poised, avoiding unwanted head movements or sudden physical gestures that break the realism of the shot.
The Three-Plane Framework for AI Depth Control
To consistently direct complex depth-of-field shots, we recommend using the Three-Plane Framework. This mental and practical model divides your frame into three distinct layers: the Foreground (FG), the Midground (MG), and the Background (BG). By clearly defining what occupies each plane and mapping out which plane holds the focus at any given moment, you can write prompts that prevent the AI from muddying the physical space.
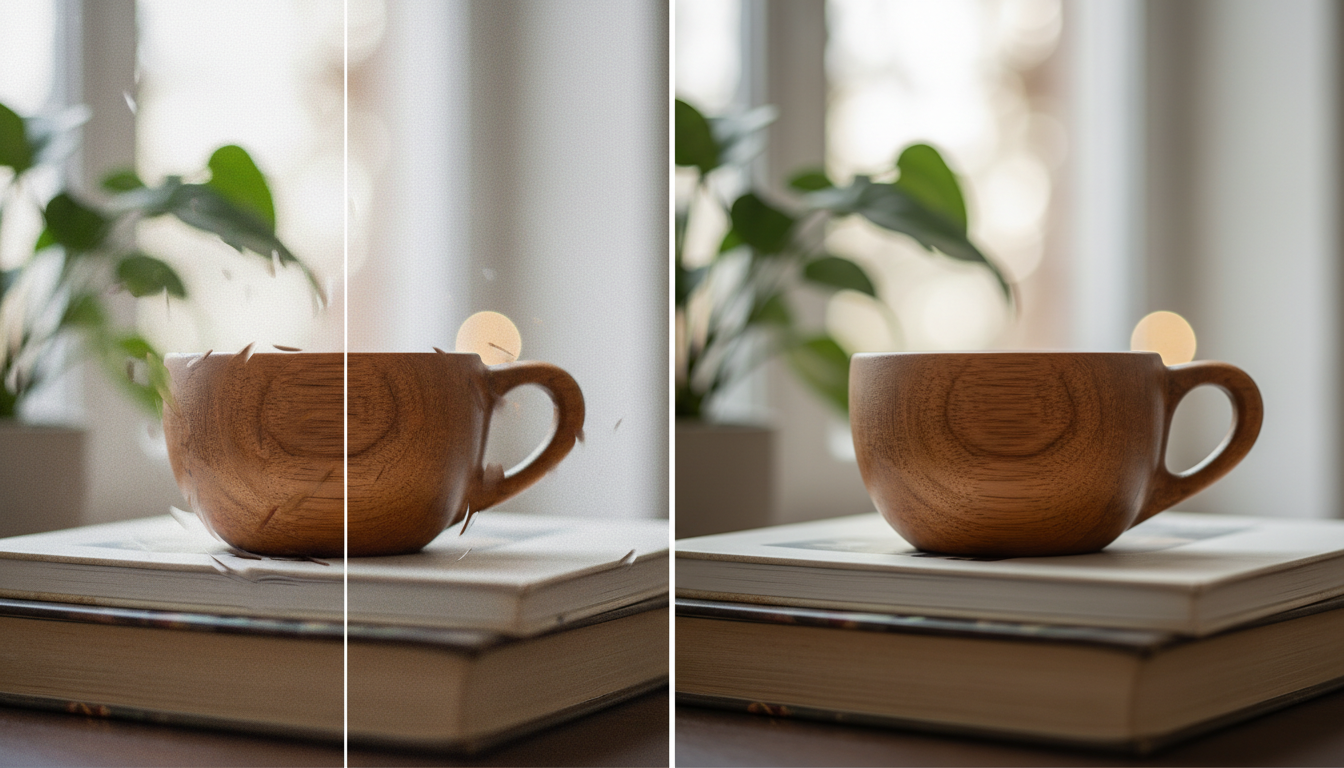
When writing your prompt, use this matrix to structure your spatial instructions:
- Foreground (FG): The layer closest to the lens. Needs to be explicitly defined as either "tack-sharp" or "heavily blurred with soft edges" depending on the start of your shot.
- Midground (MG): The middle layer, usually where the primary action or secondary subject sits. This acts as the anchor point for the transition.
- Background (BG): The deepest layer. Must contain light sources, environmental details, or distant subjects to give the camera a physical destination for the focus pull.
To make the focus shift feel truly grounded in physical space, combine your depth-of-field prompts with subtle, organic camera motion. For example, prompting a very slow, microscopic dolly-in or a gentle handheld camera shake during the focus pull creates a subtle parallax effect. As the camera moves slightly, the foreground and background shift at different speeds, providing the AI with the necessary spatial clues to render a flawless, mathematically convincing depth transition.
Troubleshooting the 'Morphing Blur' and Artifacting
Even with perfect prompt structure, AI video models can occasionally produce artifacts during complex optical transitions. The most common issue is the "morphing blur," where a blurry background object changes its shape, identity, or texture as it comes into sharp focus. For instance, a blurry lamp in the background might slowly morph into a human head or a completely different piece of furniture as the focal plane shifts.
Another frequent issue is the "diorama effect," where the background or foreground looks like a flat, static, painted card sliding behind a moving subject. Our guide on breaking the diorama effect in stagnant AI scenes offers deeper strategies for keeping your environments alive during camera transitions, ensuring that dust motes, wind, and lighting remain active while the lens focus shifts.
To resolve these common issues, implement these practical troubleshooting steps in your production workflow:
- Enforce Prop and Character Consistency:Maintaining sharp prop continuity is critical here, as objects must not morph or lose their structural details when transitioning through different focal planes. Clearly describe the physical makeup of the background objects in your prompt (e.g., "a solid brass desk lamp") so the AI knows exactly what shape to maintain as the blur clears.
- Lower the Motion Engine Settings: If your AI generator features a motion control slider or motion brush, lower the overall motion values. High motion settings encourage the AI to introduce dramatic physical movement, which often interferes with the delicate, purely optical movement of a focus pull.
- Utilize Negative Prompts: If the platform supports negative prompting, include terms like
"morphing, melting, cross-dissolve blur, flickering, digital blur, distorted geometry"to steer the model away from cheap post-production shortcuts and toward realistic optical renders.
By treating the AI video generator as a physical camera equipped with real glass lenses, you can move beyond simple digital approximations. Structuring your prompts around the real-world physics of depth, light, and motion allows you to create breathtaking, cinematic focus pulls that elevate your AI filmmaking projects to professional standards.
How do you write a prompt for a rack focus in AI video?
To write a successful rack focus prompt, use a chronological structure that explicitly states the starting focus, the transition, and the ending focus. Use technical camera terms like "85mm lens at f/1.4," "focal plane shift," and "focus pull." Clearly define what is in the foreground and background, specifying how the blur and bokeh behave as the focus shifts.
Why does my AI video morph when shifting focus from foreground to background?
AI models do not inherently understand 3D geometry; they predict pixels based on 2D patterns. When an object transitions from blurry to sharp, the AI sometimes struggles to identify what the blurry shape is supposed to be, causing it to morph into a different object. To prevent this, clearly describe the physical identity of both the foreground and background objects in your prompt so the AI retains their structural continuity.
Can you perform a focus pull using Image-to-Video workflows?
Yes, but it requires a high-contrast starting image with clear separation between the foreground and background. In your text prompt, you must instruct the AI to shift the focus from the sharp foreground to the blurry background (or vice versa), while keeping the overall scene layout and character motion subtle to prevent the AI from generating unwanted physical movement.
What are the best camera and lens terms to use for shallow depth of field in AI generators?
Use highly specific, professional filmmaking terms such as "shallow depth of field," "f/1.8 aperture," "85mm prime lens," "anamorphic bokeh," "cinematic focus pull," and "shifting focal plane." These terms guide the AI model to draw from high-quality cinematic datasets rather than flat, amateur video styles.



