
The Action Sequence Storyboard Protocol: Choreographing High-Velocity Continuity in AI Video
Action scenes are the ultimate stress test for AI video generators. Discover a systematic, professional protocol to translate static storyboards into high-velocity, continuous action sequences without losing character or spatial consistency.
Action sequences are the ultimate test for generative AI video engines. While static close-ups and slow panning shots are relatively easy for latent diffusion models to render, high-velocity motion—such as car chases, hand-to-hand combat, and rapid camera sweeps—frequently causes spatial collapse. Characters morph into background elements, limbs multiply, and physical logic dissolves into abstract visual noise.
Overcoming these limitations requires moving past basic text prompting and adopting a structured, production-grade framework. At Montagea, we have developed a systematic pipeline that bridges traditional cinematic blocking with modern latent-space prompting. This protocol ensures that every punch, drift, and camera sweep retains absolute spatial logic and character consistency from shot to shot.
The Spatial Dilemma of AI Action Sequences
In traditional filmmaking, storyboards rely on a visual shorthand—dynamic arrows, frame-to-frame notes, and camera-movement indicators—to convey momentum and physical trajectory. However, AI video models do not inherently understand these symbols. When fed a static storyboard with high-action intent, a model often interprets high-velocity motion as a cue to warp or morph the subject rather than move it through 3D space. This occurs because the model prioritizes pixel-level transitions over true physical geometry.
The key to successful AI action sequences is establishing a rigid spatial blueprint before generating a single frame. Without a clear geometric boundary, the AI has too much creative freedom, which inevitably leads to spatial drift—where the layout of a room, the position of an opponent, or the direction of a vehicle changes mid-cut. Montagea's approach to pre-visualization prioritizes physical logic and camera tracking over generic prompt generation. By structuring your generation around logical physical parameters, you constrain the latent space, forcing the AI model to respect the rules of momentum, gravity, and perspective.
Step 1: The Multi-Angle Blocking Blueprint
Before writing prompts or rendering pixels, you must block the scene. This means mapping out the physical environment and character placement to establish clear, unyielding sightlines. In traditional live-action directing, this prevents breaking the 180-degree rule; in AI filmmaking, it is the only way to keep your characters moving in the correct relative directions.
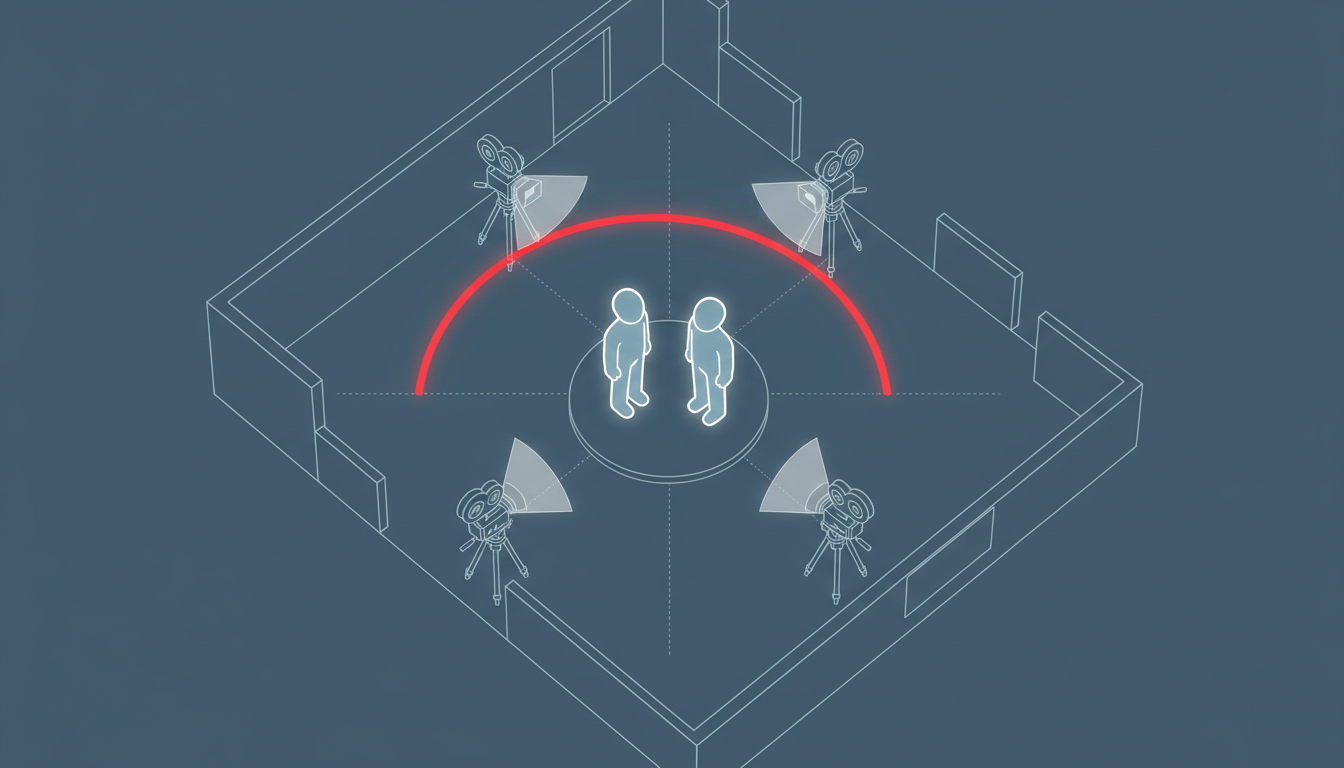
Begin by creating a simple 2D spatial map (an overhead blocking diagram) of the action sequence. Mark the starting positions of your characters, their paths of motion, and the corresponding camera setups. Once the physical layout is set, generate reference "anchor assets" for your characters and environments. These are high-resolution, static images generated from neutral angles that lock in visual details like clothing textures, facial features, and environmental assets. By referencing these identical anchor assets across your entire generation pipeline, you eliminate the visual drift that typically plagues fast-paced sequences.
| Blocking Element | Traditional Film Production | AI Latent-Space Production |
|---|---|---|
| Spatial Mapping | Overhead diagrams for actor and camera placement. | 2D spatial layout used to dictate directional prompts and sightlines. |
| Consistency Control | Physical continuity supervisors, wardrobe, and set design. | High-resolution "anchor assets" and locked seed configurations. |
| Camera Movement | Physical dollies, cranes, and handheld rigs. | Kinetic vector prompts combined with camera-control parameters. |
To ensure consistency during high-motion generations, use a standardized naming convention for your characters and a locked seed strategy. If your protagonist is established as a "tactical operative in a matte-black helmet," that exact descriptor must remain unchanged across every shot's prompt. When generating variations, keep your seed values closely grouped to maintain a cohesive visual texture across different angles.
Step 2: Translating Kinetic Vectors into Prompts
Writing prompts for action sequences requires a highly structured syntax. If you simply write "a motorcycle chases a car down a highway," the AI model will struggle to separate the motion of the motorcycle, the motion of the car, and the motion of the camera. The result is often a muddy, low-velocity generation where objects slide awkwardly across a static background.
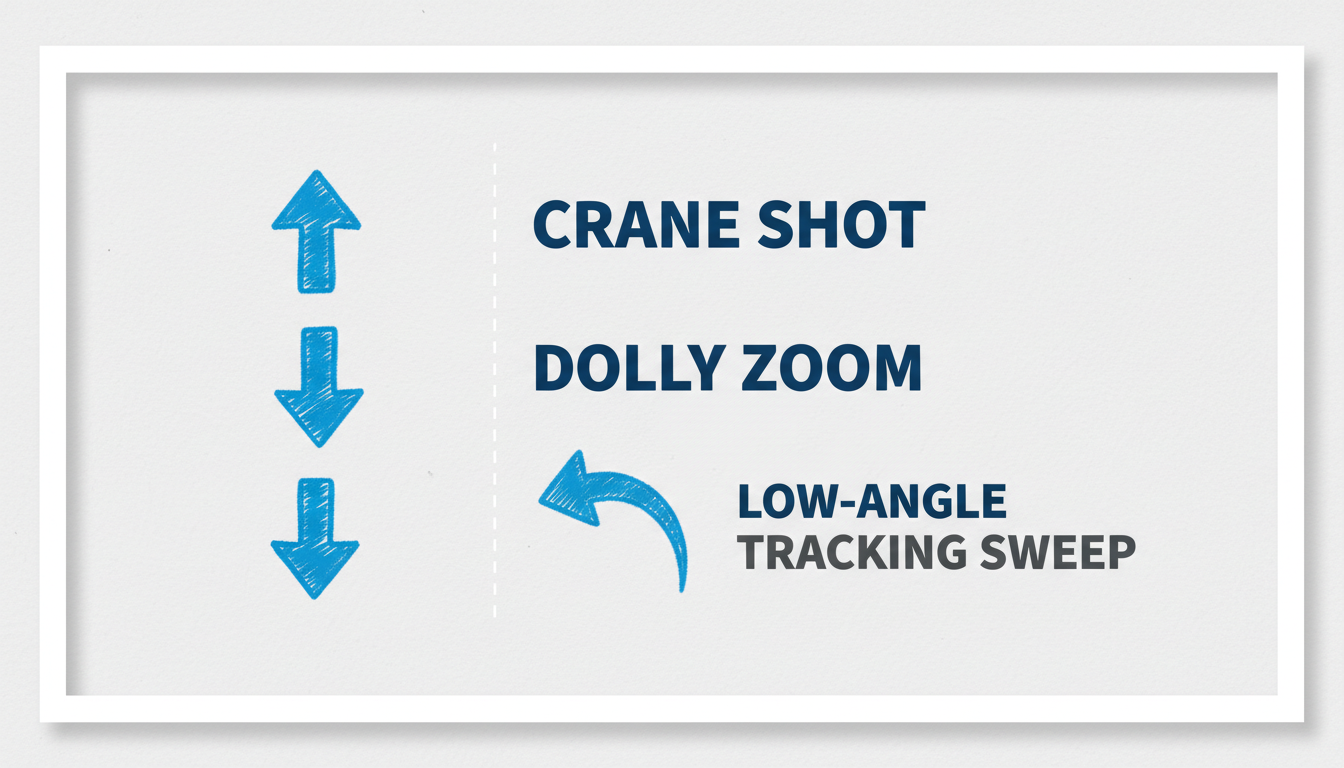
To prevent this, you must separate character action from camera movement using our Kinetic Vector Prompting Formula:
[Subject] + [Specific Physical Action] + [Camera Vector] + [Temporal Speed Modifier]
Choosing Kinematic Verbs over Passive Phrases
Passive verbs are the enemy of high-velocity AI generation. Phrases like "is running" or "is driving" yield slow, predictable movements. Instead, use high-impact kinematic verbs that imply force, direction, and acceleration. Replace "runs" with "sprints," "vaults," "hurdles," or "barrels." Replace "drives" with "drifts," "slams," "accelerates," or "weaves."
Let's look at this formula in action. Instead of a generic prompt, write: "A tactical operative in a matte-black helmet vaults over a concrete barrier, low-angle tracking shot panning dynamically, high-velocity motion blur, intense cinematic timing." By separating the subject's physical leap from the camera's low-angle pan, you give the AI model clear, distinct instructions for both foreground and background motion.
Step 3: The Storyboard-to-Motion Pipeline
Once your blocking is mapped and your kinetic prompts are formulated, it is time to transition from static layouts to dynamic video. Relying solely on text-to-video (T2V) for complex action is highly inefficient; it requires hundreds of generations to get a single shot that matches your vision. Instead, use image-to-video (I2V) as your primary bridge.
To master the transition from static layouts to temporal consistency, filmmakers can implement the structured storyboard-to-motion pipeline. This process begins by generating highly detailed storyboard panels using your anchor assets as style references. These static panels represent the keyframes of your action sequence, capturing the precise composition, lighting, and character posing required for each cut.
Before generating, it is critical to organize your narrative parameters using a standardized scene brief protocol. This brief details the exact emotional beats, camera directions, and continuity markers for the sequence. Once your storyboard panels and scene briefs are aligned, feed the static panel into your I2V engine. Rather than letting the model generate randomly, use the image as a hard structural guide, applying your kinetic vector prompts to dictate how the static composition explodes into motion.
To maintain temporal continuity across multiple cuts, employ a sequential handoff technique. Use the final frame of your first generated clip as the starting image input for your next generation. This ensures that the character's physical position, lighting, and background details remain perfectly continuous from the end of one shot to the beginning of the next.
Step 4: Advanced Keyframing and Camera Sweeps for High-Velocity Cuts
In high-speed editing, the transitions between cuts are just as important as the action within the shots. A sudden, jarring cut can break the audience's immersion, whereas a seamless, high-velocity camera transition maintains the sequence's momentum. This is where advanced keyframing and camera sweeps become essential tools in your AI workflow.
For precise control over complex physical transitions, mastering a first and last frame workflow is essential. By providing the AI engine with both the starting composition and the ending composition of a high-action event—such as a stunt fall or an explosion—you force the model to interpolate the complex physical motion between those two points, preventing the visual warping that often occurs during unconstrained generations.
To seamlessly blend high-speed cuts together, filmmakers can utilize a kinetic whip pan protocol to generate natural motion blur. By prompting rapid camera sweeps at the tail end of a shot and the head of the subsequent shot, you create natural visual bridges. The motion blur masks the transition, making the cut feel like a continuous, breathless camera movement rather than a hard edit.
The AI Action Sequence Audit Checklist
Before bringing your generated clips into the editing suite, run them through this quality control checklist to ensure they meet professional production standards:
- Anatomical Integrity: Ensure limbs do not multiply, morph, or bend unnaturally during fast movements.
- Vector Consistency: Verify that characters and vehicles move in the correct direction relative to the established 180-degree line.
- Environmental Anchor: Check that the background elements (buildings, roads, lighting sources) do not drift or shift shape mid-shot.
- Motion Scale: Confirm that the speed of the camera movement matches the velocity of the subject to avoid a "sliding" look.
- Artifacting: Scan the high-velocity areas of the frame for digital noise, pixelation, or temporal tearing.
By executing this structured protocol, you transform AI video generation from a game of chance into a precise, repeatable filmmaking discipline. The combination of rigid physical blocking, kinetic vector prompting, and advanced keyframe control allows you to direct high-velocity action sequences that rival traditional cinematic productions in both scale and continuity.
How do I keep characters consistent across different action shots in AI video?
To maintain character consistency, generate a set of high-resolution, static "anchor assets" showing your character from multiple angles in neutral lighting. Use these images as style and character references in your image-to-video (I2V) pipeline. Additionally, use a highly specific, locked character description (e.g., "tactical operative in a matte-black helmet") across all prompts, and keep your generation seeds closely grouped.
What is the best way to prompt fast camera movements like whip pans or drone chases?
Use the Kinetic Vector Prompting Formula to separate the subject's action from the camera's movement. Employ highly descriptive camera vectors like "low-angle tracking sweep," "dynamic whip pan," or "high-speed FPV drone chase." Pair these with speed modifiers such as "high-velocity motion blur" and "kinetic camera momentum" to force the AI model to render realistic camera physics.
How do I prevent AI video models from turning fast motion into visual morphing?
Morphing occurs when the AI model lacks physical constraints. To prevent this, use image-to-video (I2V) generation instead of text-to-video (T2V). By starting with a highly structured storyboard panel, you provide a geometric anchor. Additionally, utilize first-and-last-frame workflows to define the exact starting and ending points of complex physical actions, forcing the AI to interpolate logically between them.
Can I use traditional hand-drawn storyboards as image-to-video inputs for AI action scenes?
Yes. Traditional hand-drawn storyboards are excellent inputs because they establish clear compositions and perspective lines. To get the best results, pass your hand-drawn sketch through an image-to-image (I2I) generator first to render it in your desired cinematic style, then use that rendered keyframe as the input for your image-to-video (I2V) engine.



