
AI Video Inpainting: How to Remove and Replace Objects with Temporal Consistency
Discover the exact workflows and settings needed to remove or replace objects in video footage using AI. This practical guide covers masking, tracking, and troubleshooting temporal flickering.
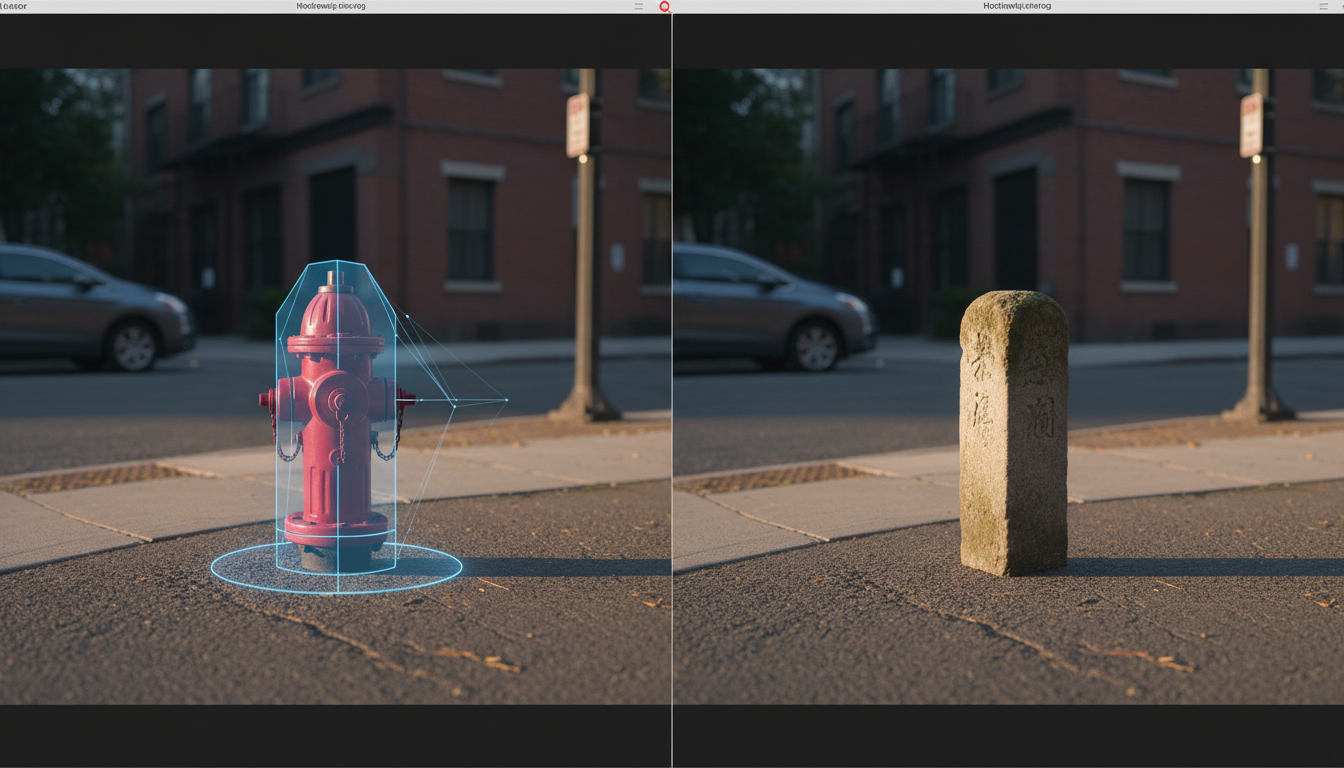
AI video inpainting is the process of reconstructing, removing, or replacing specific visual elements within a tracked mask across a sequence of moving frames. Unlike static image inpainting, which only requires spatial context, video inpainting must maintain temporal consistency across the timeline. If the generated pixels do not align frame-to-frame, the video will suffer from distracting artifacts like flickering, warping, and edge drift. Achieving a production-ready result requires combining precise rotoscoping, feathered mask boundaries, and motion-aware AI generation models.
What is AI Video Inpainting and How Does It Work?
At its core, video inpainting works by generating context-aware pixels inside a moving mask boundary. The model looks at the surrounding unmasked pixels (spatial context) and the preceding and succeeding frames (temporal context) to calculate what should logically occupy the masked space. This is highly complex because a moving camera changes perspective, lighting, and background visibility continuously.
The primary technical challenge is temporal consistency. When standard generative models treat each frame as an isolated prompt, they introduce variations in texture, geometry, and lighting from one frame to the next. To prevent this, advanced inpainting pipelines utilize optical flow algorithms and motion vectors. These tools map the velocity and direction of pixels across frames, guiding the AI to anchor its generated details to the scene's underlying physical geometry. When evaluating video generation models for physical accuracy, the key metric is how seamlessly the model preserves these geometric vectors under dynamic lighting and complex camera pans.
A Step-by-Step Workflow for Clean Object Removal
Removing an unwanted object—such as a modern street sign in a historical drama or production gear left in the frame—requires a structured masking and tracking workflow to ensure the AI has clean boundaries to work with.
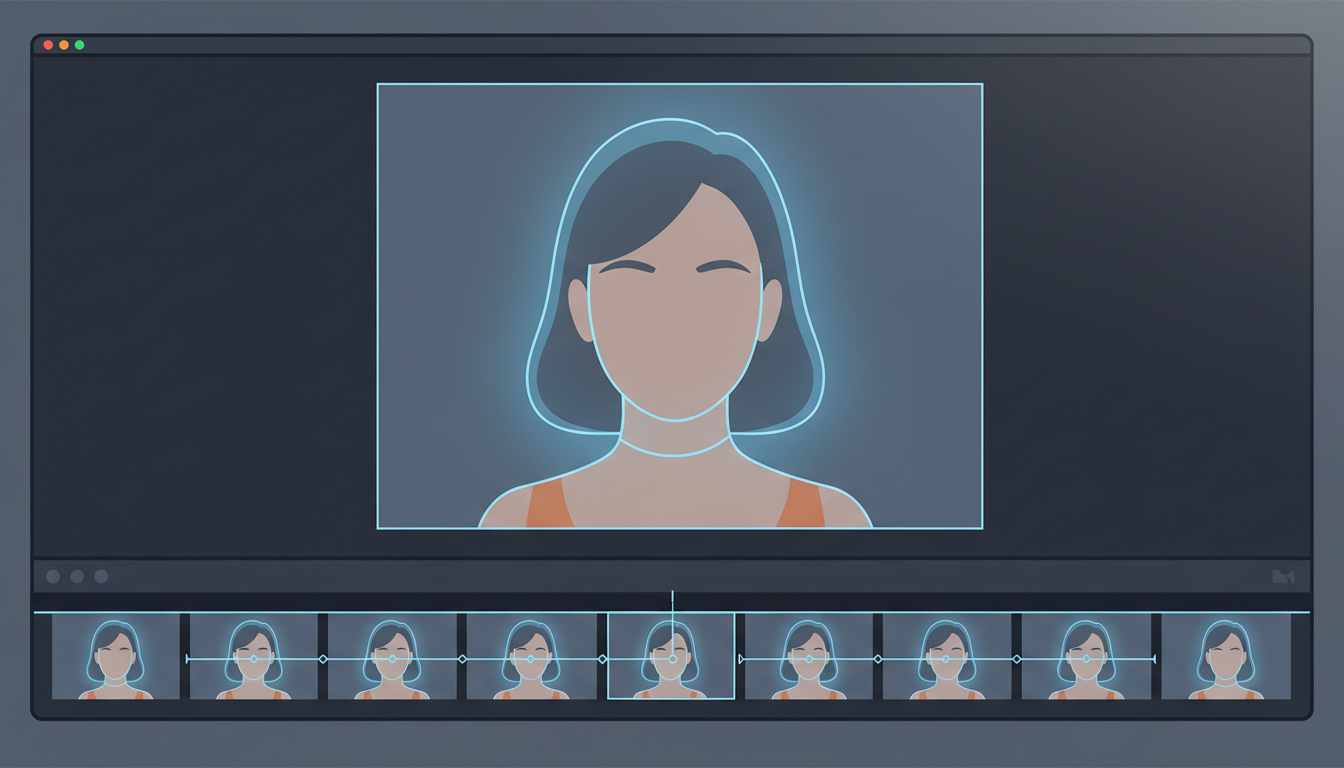
- Step 1: Create a tight but forgiving rotoscope mask. Draw a vector mask around the target object. The mask should be tight enough to limit the area the AI must regenerate, but loose enough to fully encompass the object's outermost edges throughout its movement.
- Step 2: Track the mask and its shadows. Track the mask across the timeline. Crucially, you must also mask out any associated shadows, reflections, or light leaks caused by the object. Leaving a detached shadow in the frame will break the realism instantly.
- Step 3: Feather the mask boundaries. Apply a subtle feather (typically 5 to 15 pixels, depending on your source resolution) to the mask edges. This prevents harsh lines and allows the AI to blend its generated pixels naturally with the original background textures.
- Step 4: Run the generation and evaluate. Render the inpainting pass. Preview the clip at full speed to check for temporal drift. If the fill area slides or shifts relative to the background, you will need to adjust the tracking or expand the mask.
Replacing Objects and Managing Prompt Influence
When swapping an object instead of simply erasing it, your workflow shifts from basic inpainting to guided replacement. In this scenario, you must carefully balance your descriptive prompts with the model's settings to ensure the new object looks like it was captured on set.
To make a replacement look natural, your prompt must describe not only the new object but also the environmental lighting, camera lens, and film grain of the original footage. For example, if you are replacing a plastic bottle on a wooden table with a ceramic mug, your prompt should specify the light direction and surface quality: "A matte ceramic mug resting on a rustic wooden table, soft side-lighting, shallow depth of field, natural film grain."
You must also control the prompt strength (often labeled as denoising strength or influence). If the strength is set too high, the AI may alter the unmasked parts of your frame, changing the texture of the table or the background. If it is too low, the model will fail to generate the new object and will simply blur the original. The table below outlines how to balance these parameters:
| Prompting Strategy | Denoising / Strength Setting | Visual Result | Best Use Case |
|---|---|---|---|
| Weak / Underspecified | Low (0.2 - 0.4) | Blurry smudge or partial ghost of the original object. | Subtle texture cleanups or minor blemishes. |
| Balanced & Descriptive | Medium (0.5 - 0.7) | New object matches scene lighting, grain, and perspective. | Seamless object replacements (e.g., swapping a prop). |
| Over-styled / Too Strong | High (0.8 - 1.0) | AI alters unmasked background; harsh style seams appear. | Complete stylistic transformations (requires heavy compositing). |
Troubleshooting Temporal Failures: Flickering, Warping, and Edge Bleeding
Even with precise tracking, AI video generations can fail. Use this quick diagnostic framework to identify and resolve the three most common inpainting errors:
1. Flickering and Micro-Jitter
The Issue: The inpainted area shifts rapidly in brightness or texture from frame to frame.
The Fix: Lock the generation seed if your tool supports it, or apply a temporal smoothing filter in post-production. If the flicker persists, export the inpainted region as a single clean-plate frame, align it to the camera movement using a 2D or 3D tracker, and blend it back over the footage with a static mask.
2. Warping and Physical Distortion
The Issue: The generated pixels warp or stretch unnaturally during fast camera pans or perspective shifts.
The Fix: Break the video clip into shorter segments (e.g., 10 to 15 frames). Inpainting shorter sequences prevents the model from compounding tracking errors over time. Once generated, stitch the segments back together with subtle crossfades.
3. Edge Bleeding and Halos
The Issue: Colors or textures from the original, unwanted object bleed through the edges of the inpainted area, creating a ghostly halo.
The Fix: Expand your tracking mask's margin slightly to ensure the original object is completely covered. This forces the AI model to draw context purely from the clean, surrounding environment rather than the pixels directly adjacent to the object's boundary.
Optimizing Your Inpainting Pipeline and Budget
Integrating AI inpainting into a professional post-production pipeline requires balancing visual quality against generation costs. When exploring options like those in our guide on choosing the best AI video editing tools for 2026 production workflows, it is helpful to distinguish between dedicated editing software and asset generation platforms. For generating the initial creative assets, background plates, or style variations that feed into your editing suite, an AI creative agent like Montagea can orchestrate multiple models to deliver the exact video, image, or music assets you describe.
Because high-resolution video inpainting can quickly consume computing resources, planning an AI video credit budget is essential. To optimize your spend, always test your masking, tracking, and prompting strategies on low-resolution, downscaled proxy clips first. Once you achieve a temporally stable result on the proxy, apply those exact parameters and mask paths to the high-resolution source file for the final render. Finally, remember that AI is most powerful when combined with traditional compositing: using a clean plate for static background areas and reserving AI inpainting strictly for dynamic, moving intersections will yield the cleanest, most cost-effective master file.
Can AI video inpainting handle complex camera pans and dynamic lighting changes?
Yes, but it requires advanced models that utilize optical flow and motion vector tracking. If the camera pan is exceptionally fast or the lighting changes dramatically (e.g., a strobe light), you may need to segment the clip into shorter ranges or use a hybrid workflow combining AI inpainting with traditional clean-plate compositing.
How do I prevent the inpainted area from looking lower resolution than the original footage?
Avoid edge resolution mismatches by matching the generation resolution closely to your source footage. Additionally, write descriptive prompts that specify "natural film grain" or "fine texture" to prevent the AI from outputting over-smoothed, plastic-looking pixels. Adding a matching grain pass in your video editor during final color grading also helps blend the layers.
Is it better to inpaint an entire clip or split it into smaller frame ranges?
For clips longer than 2 to 3 seconds, it is almost always better to split the footage into smaller frame ranges. This limits the compounding tracking drift of the AI model, preserves spatial detail, and saves generation credits by allowing you to troubleshoot and re-render only the specific frames that fail.



